[ED-2195] App management
Premium featureThis is a premium feature. Contact your customer success manager for more details.
Overview
Supported platforms
- LINE
Integrate your chatbot with a third-party e-commerce service to give your users instant access to personalized features. After you've added a connected service and the user has linked their account, they'll be able to:
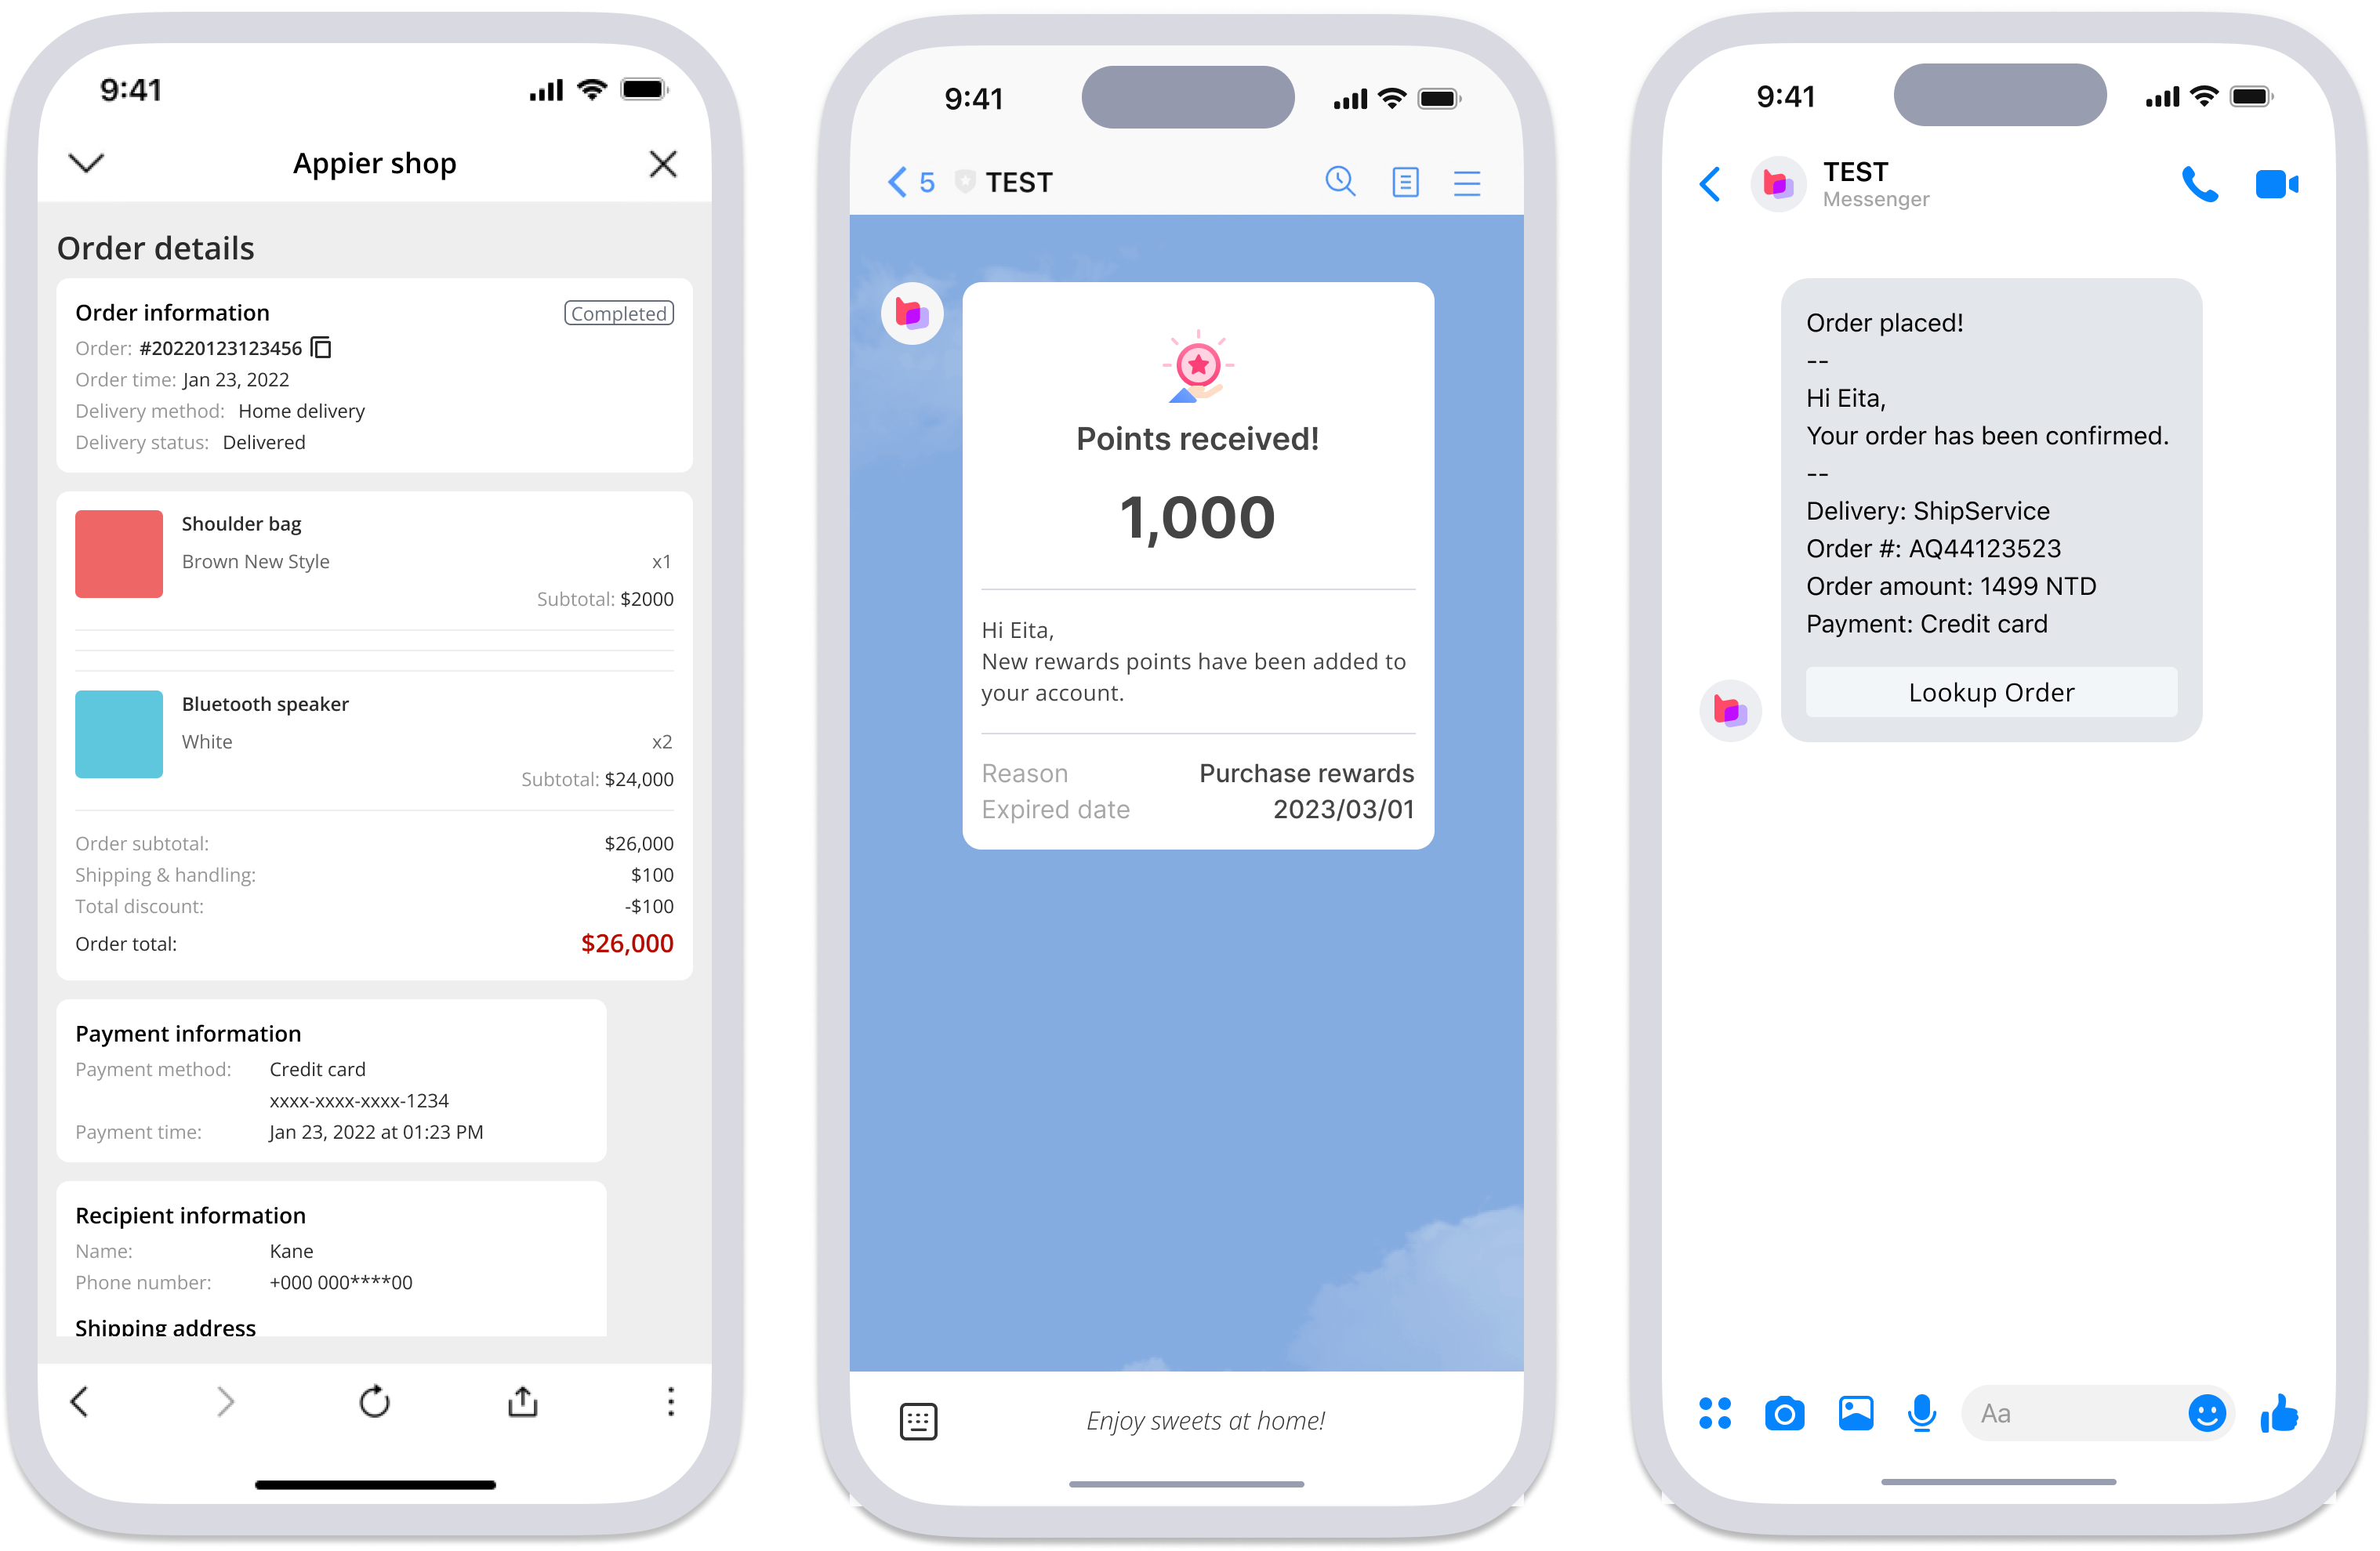
- View their transaction history at any time
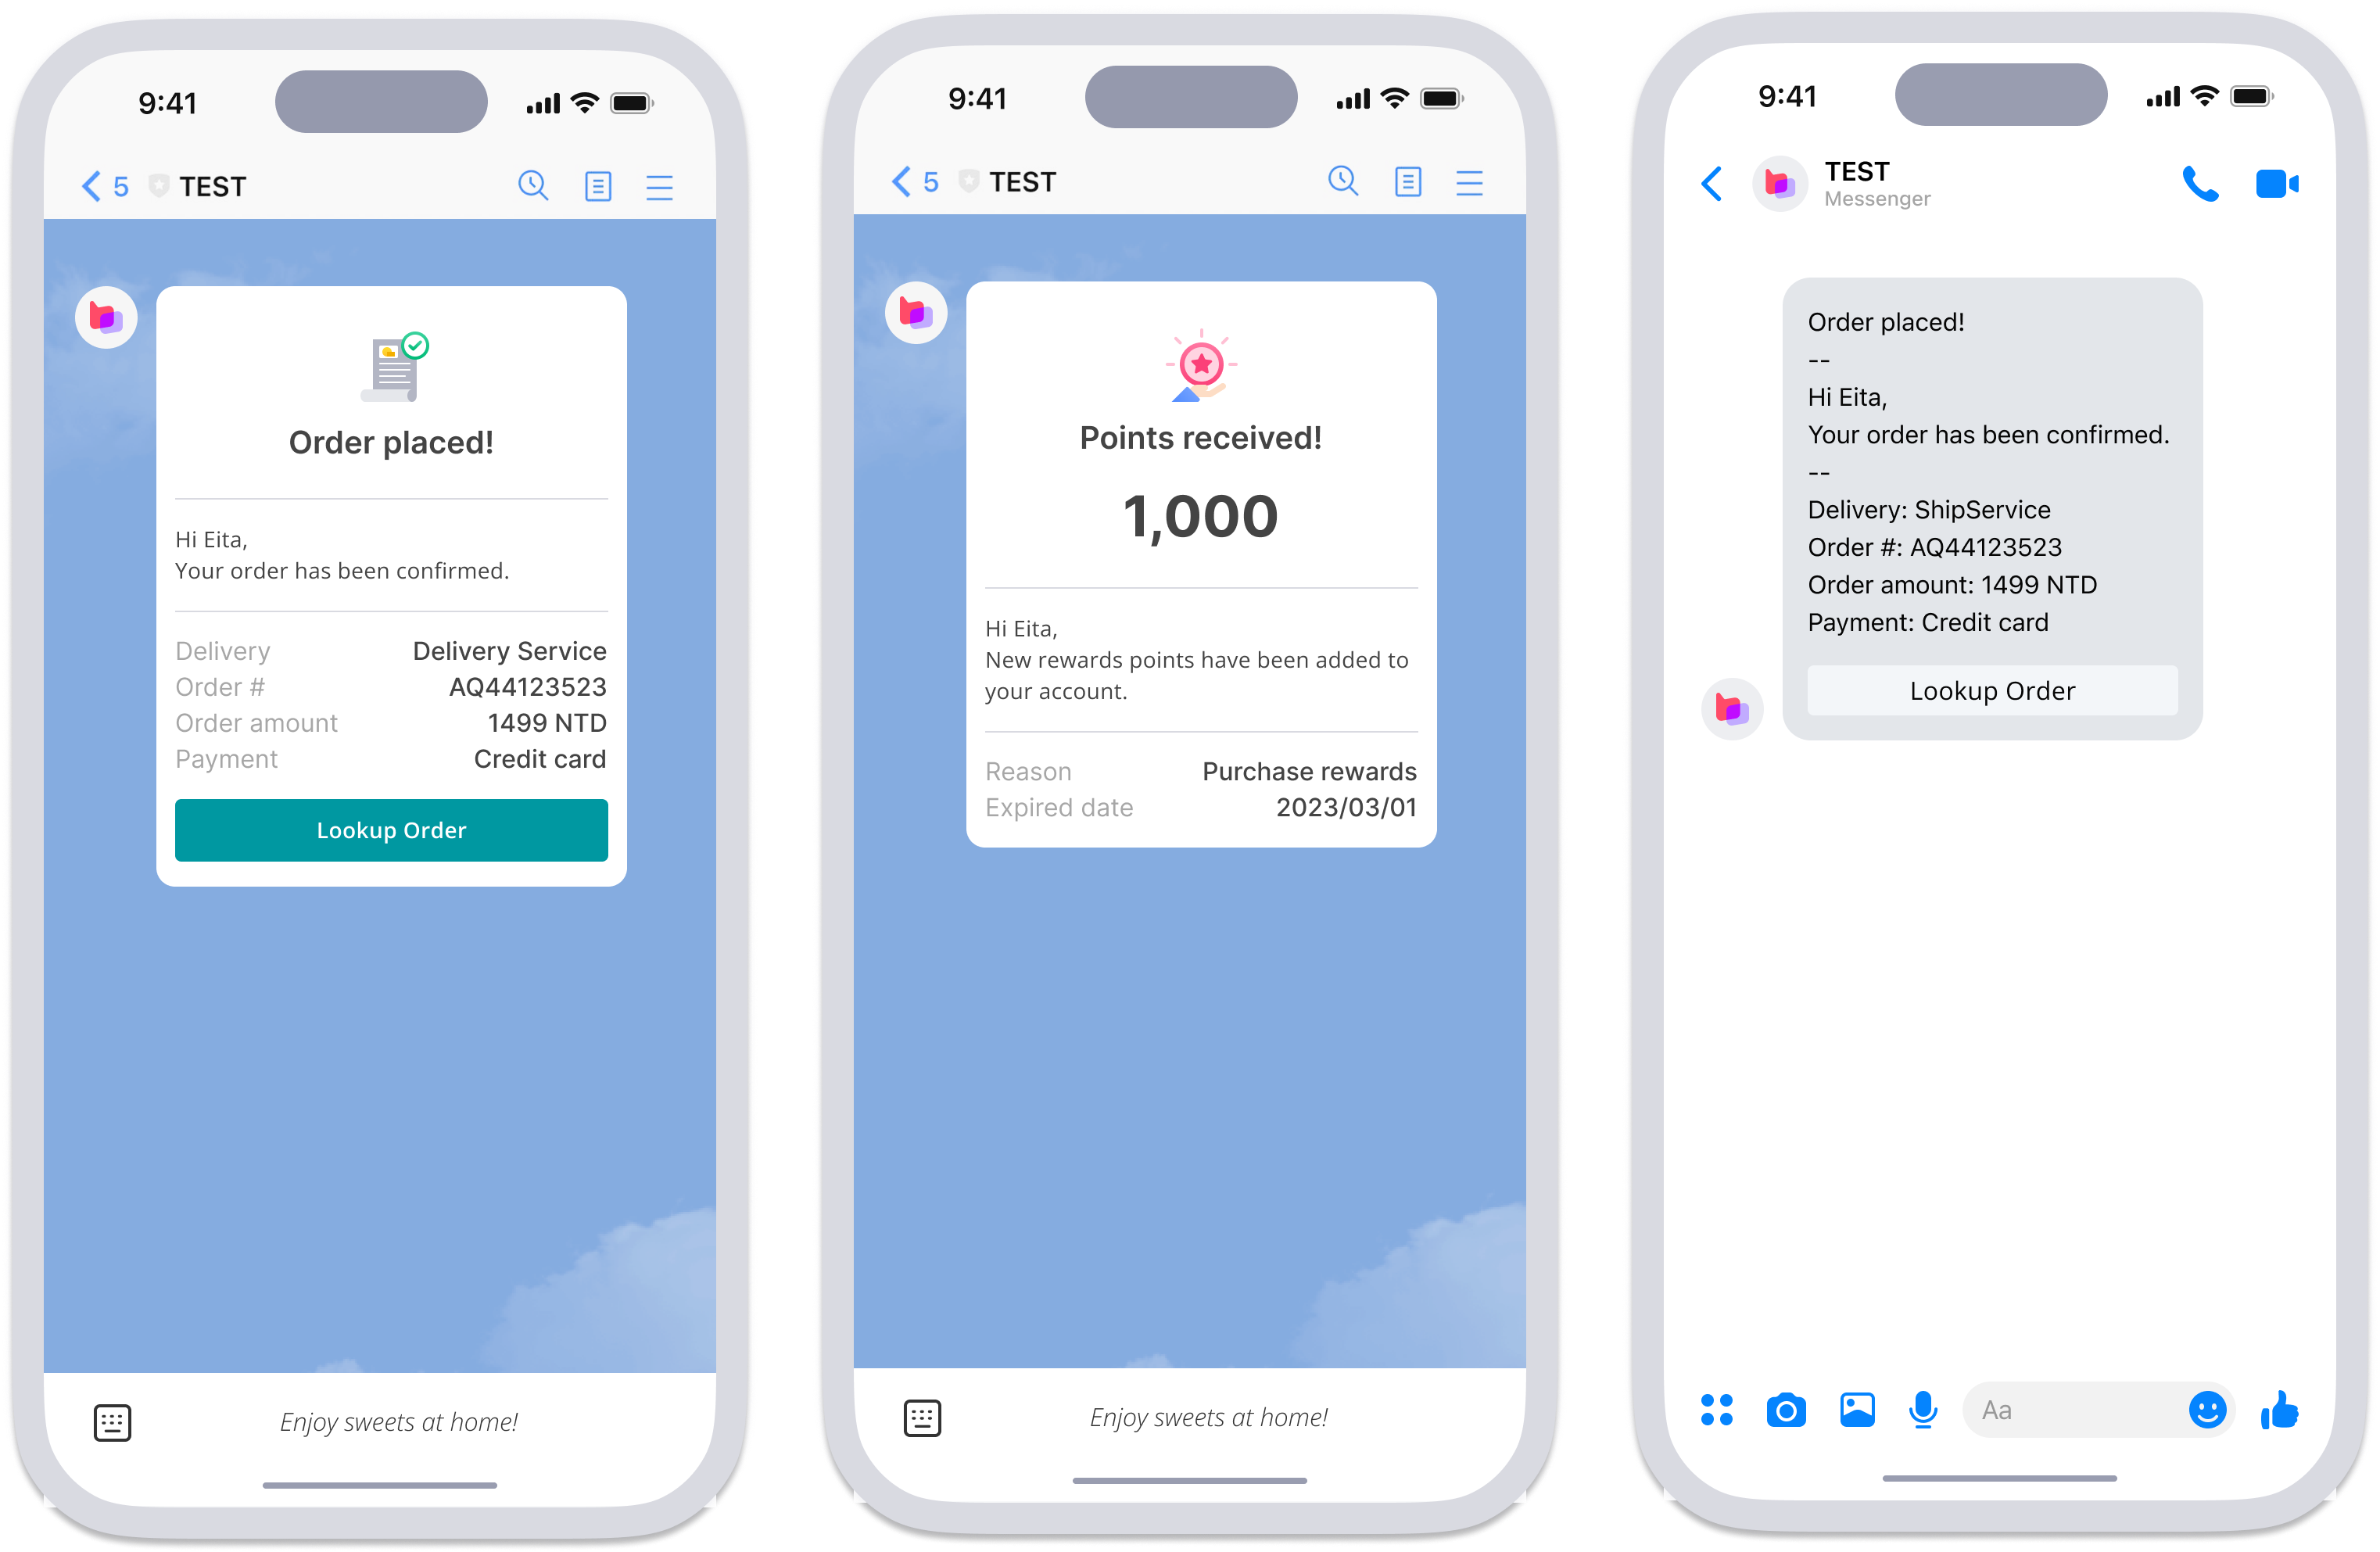
- Receive automatic status notifications, such as order updates and changes to reward balances
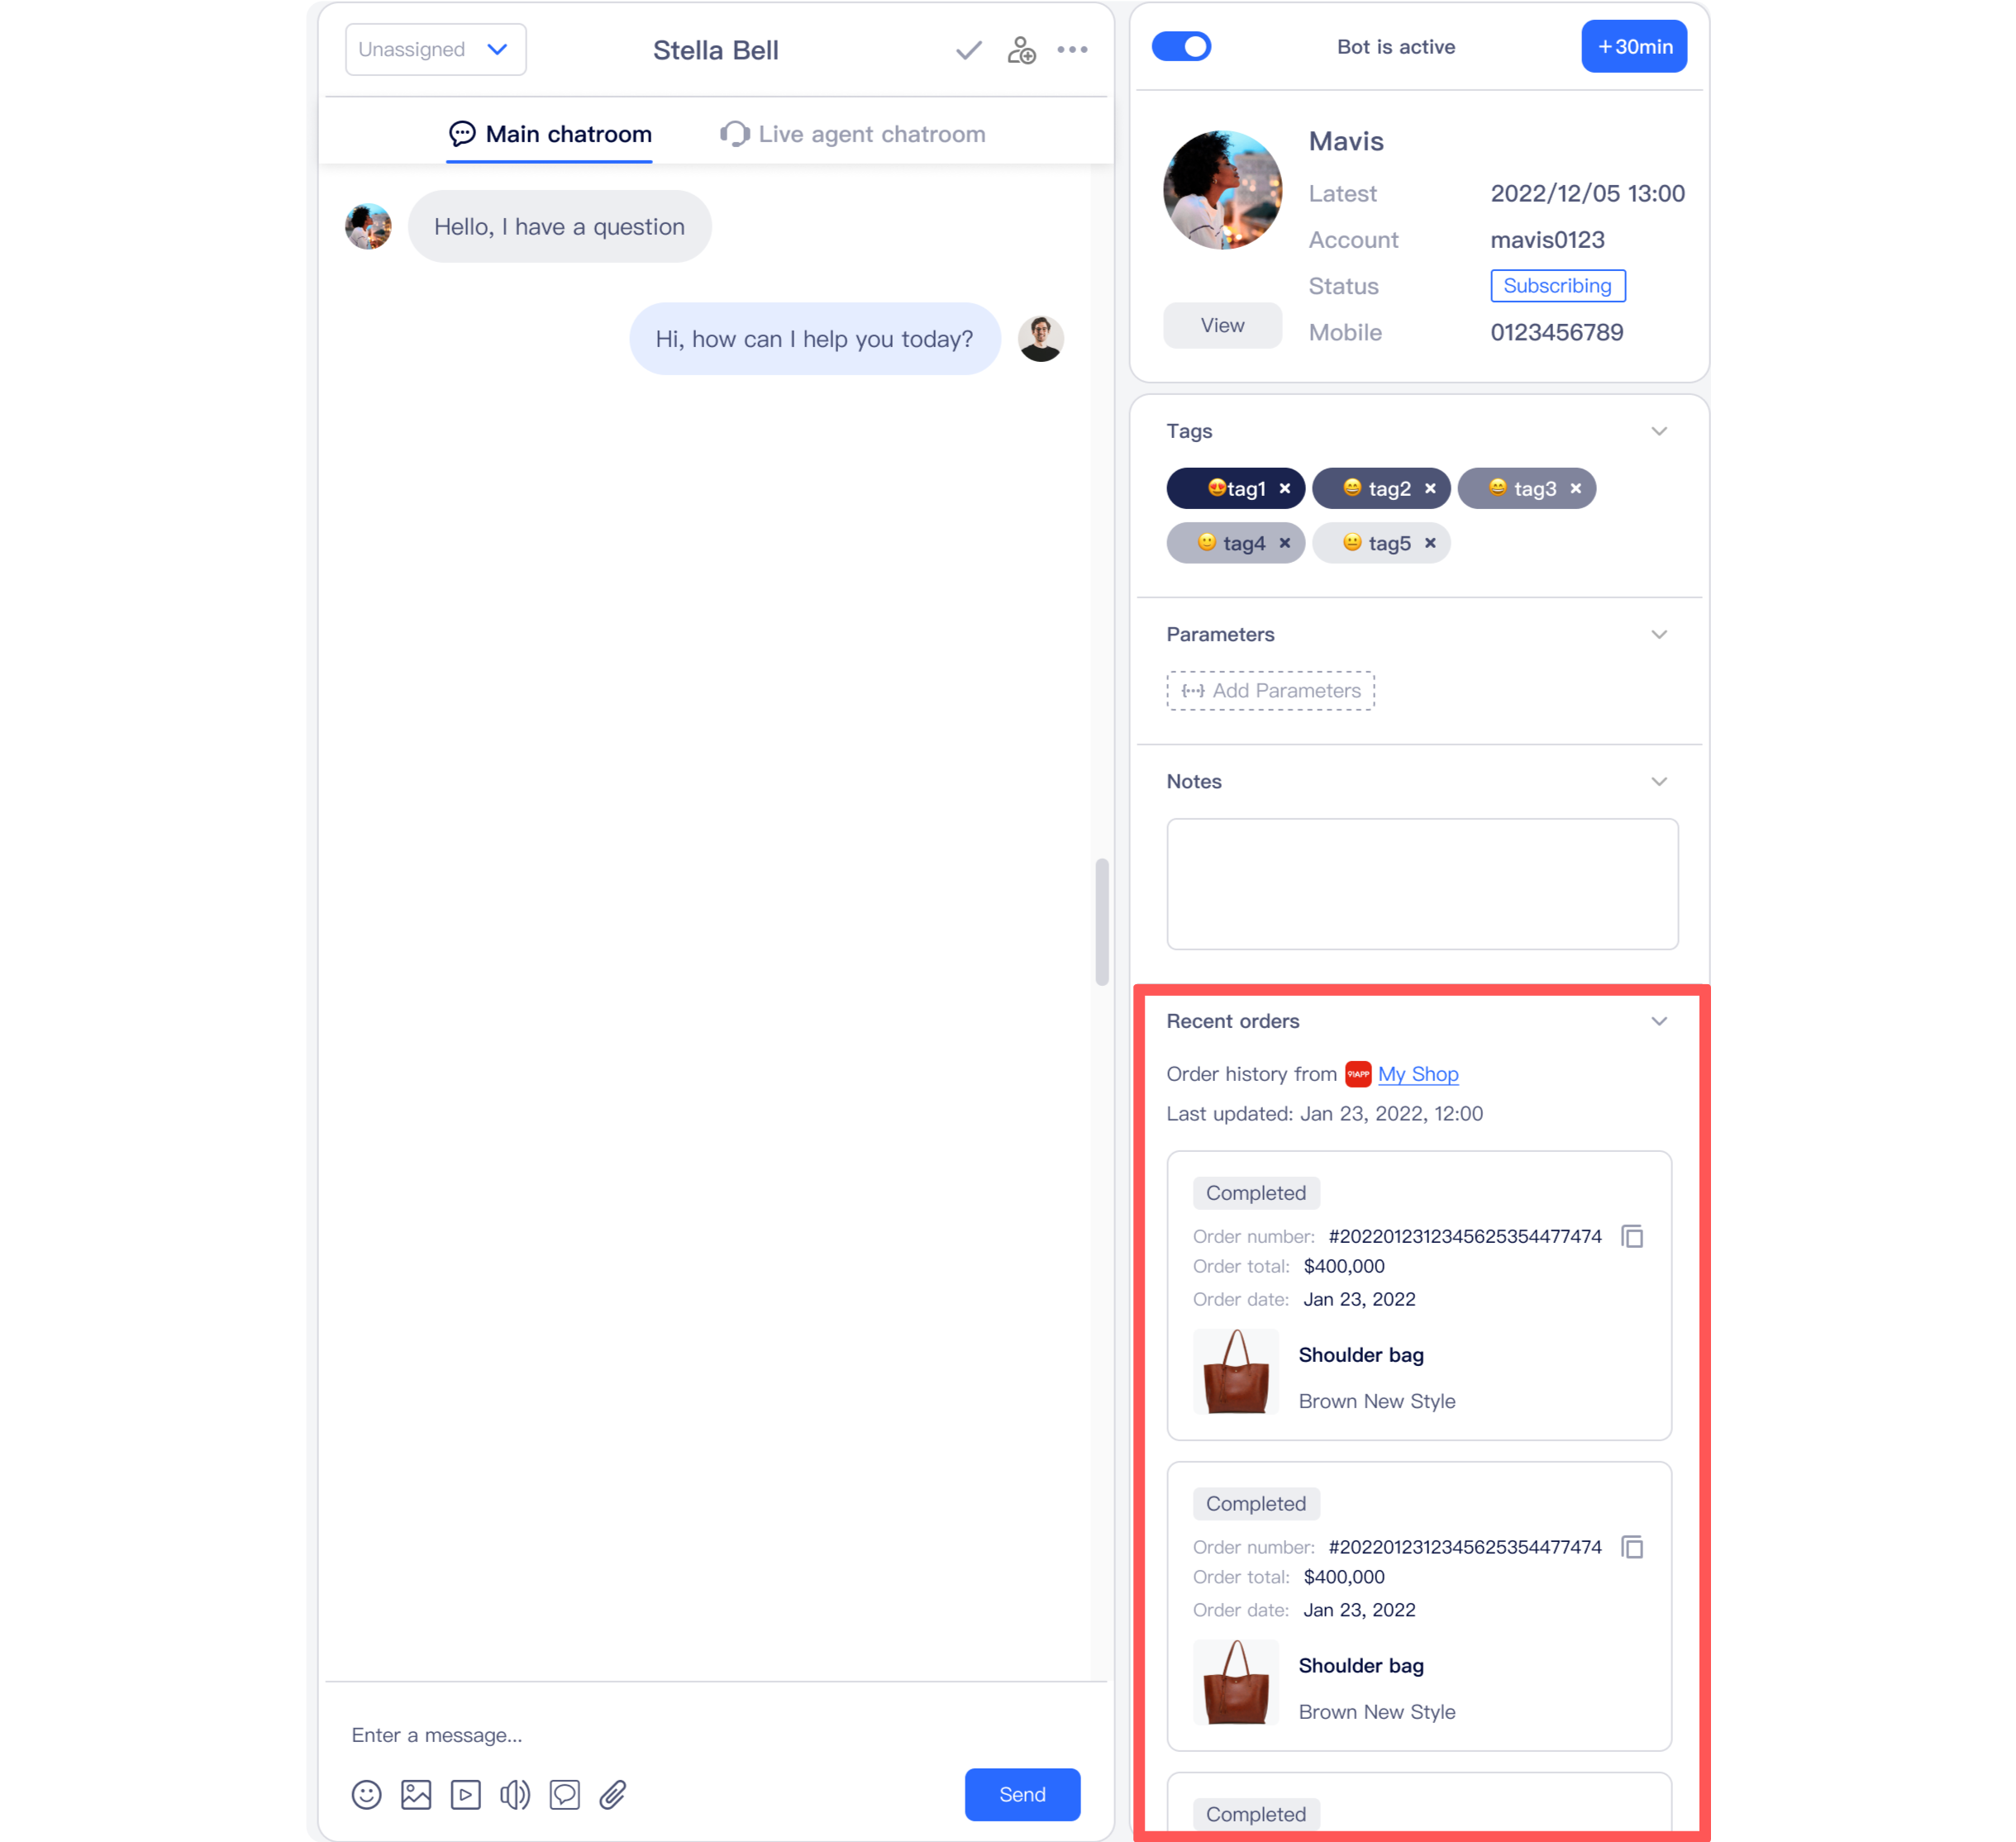
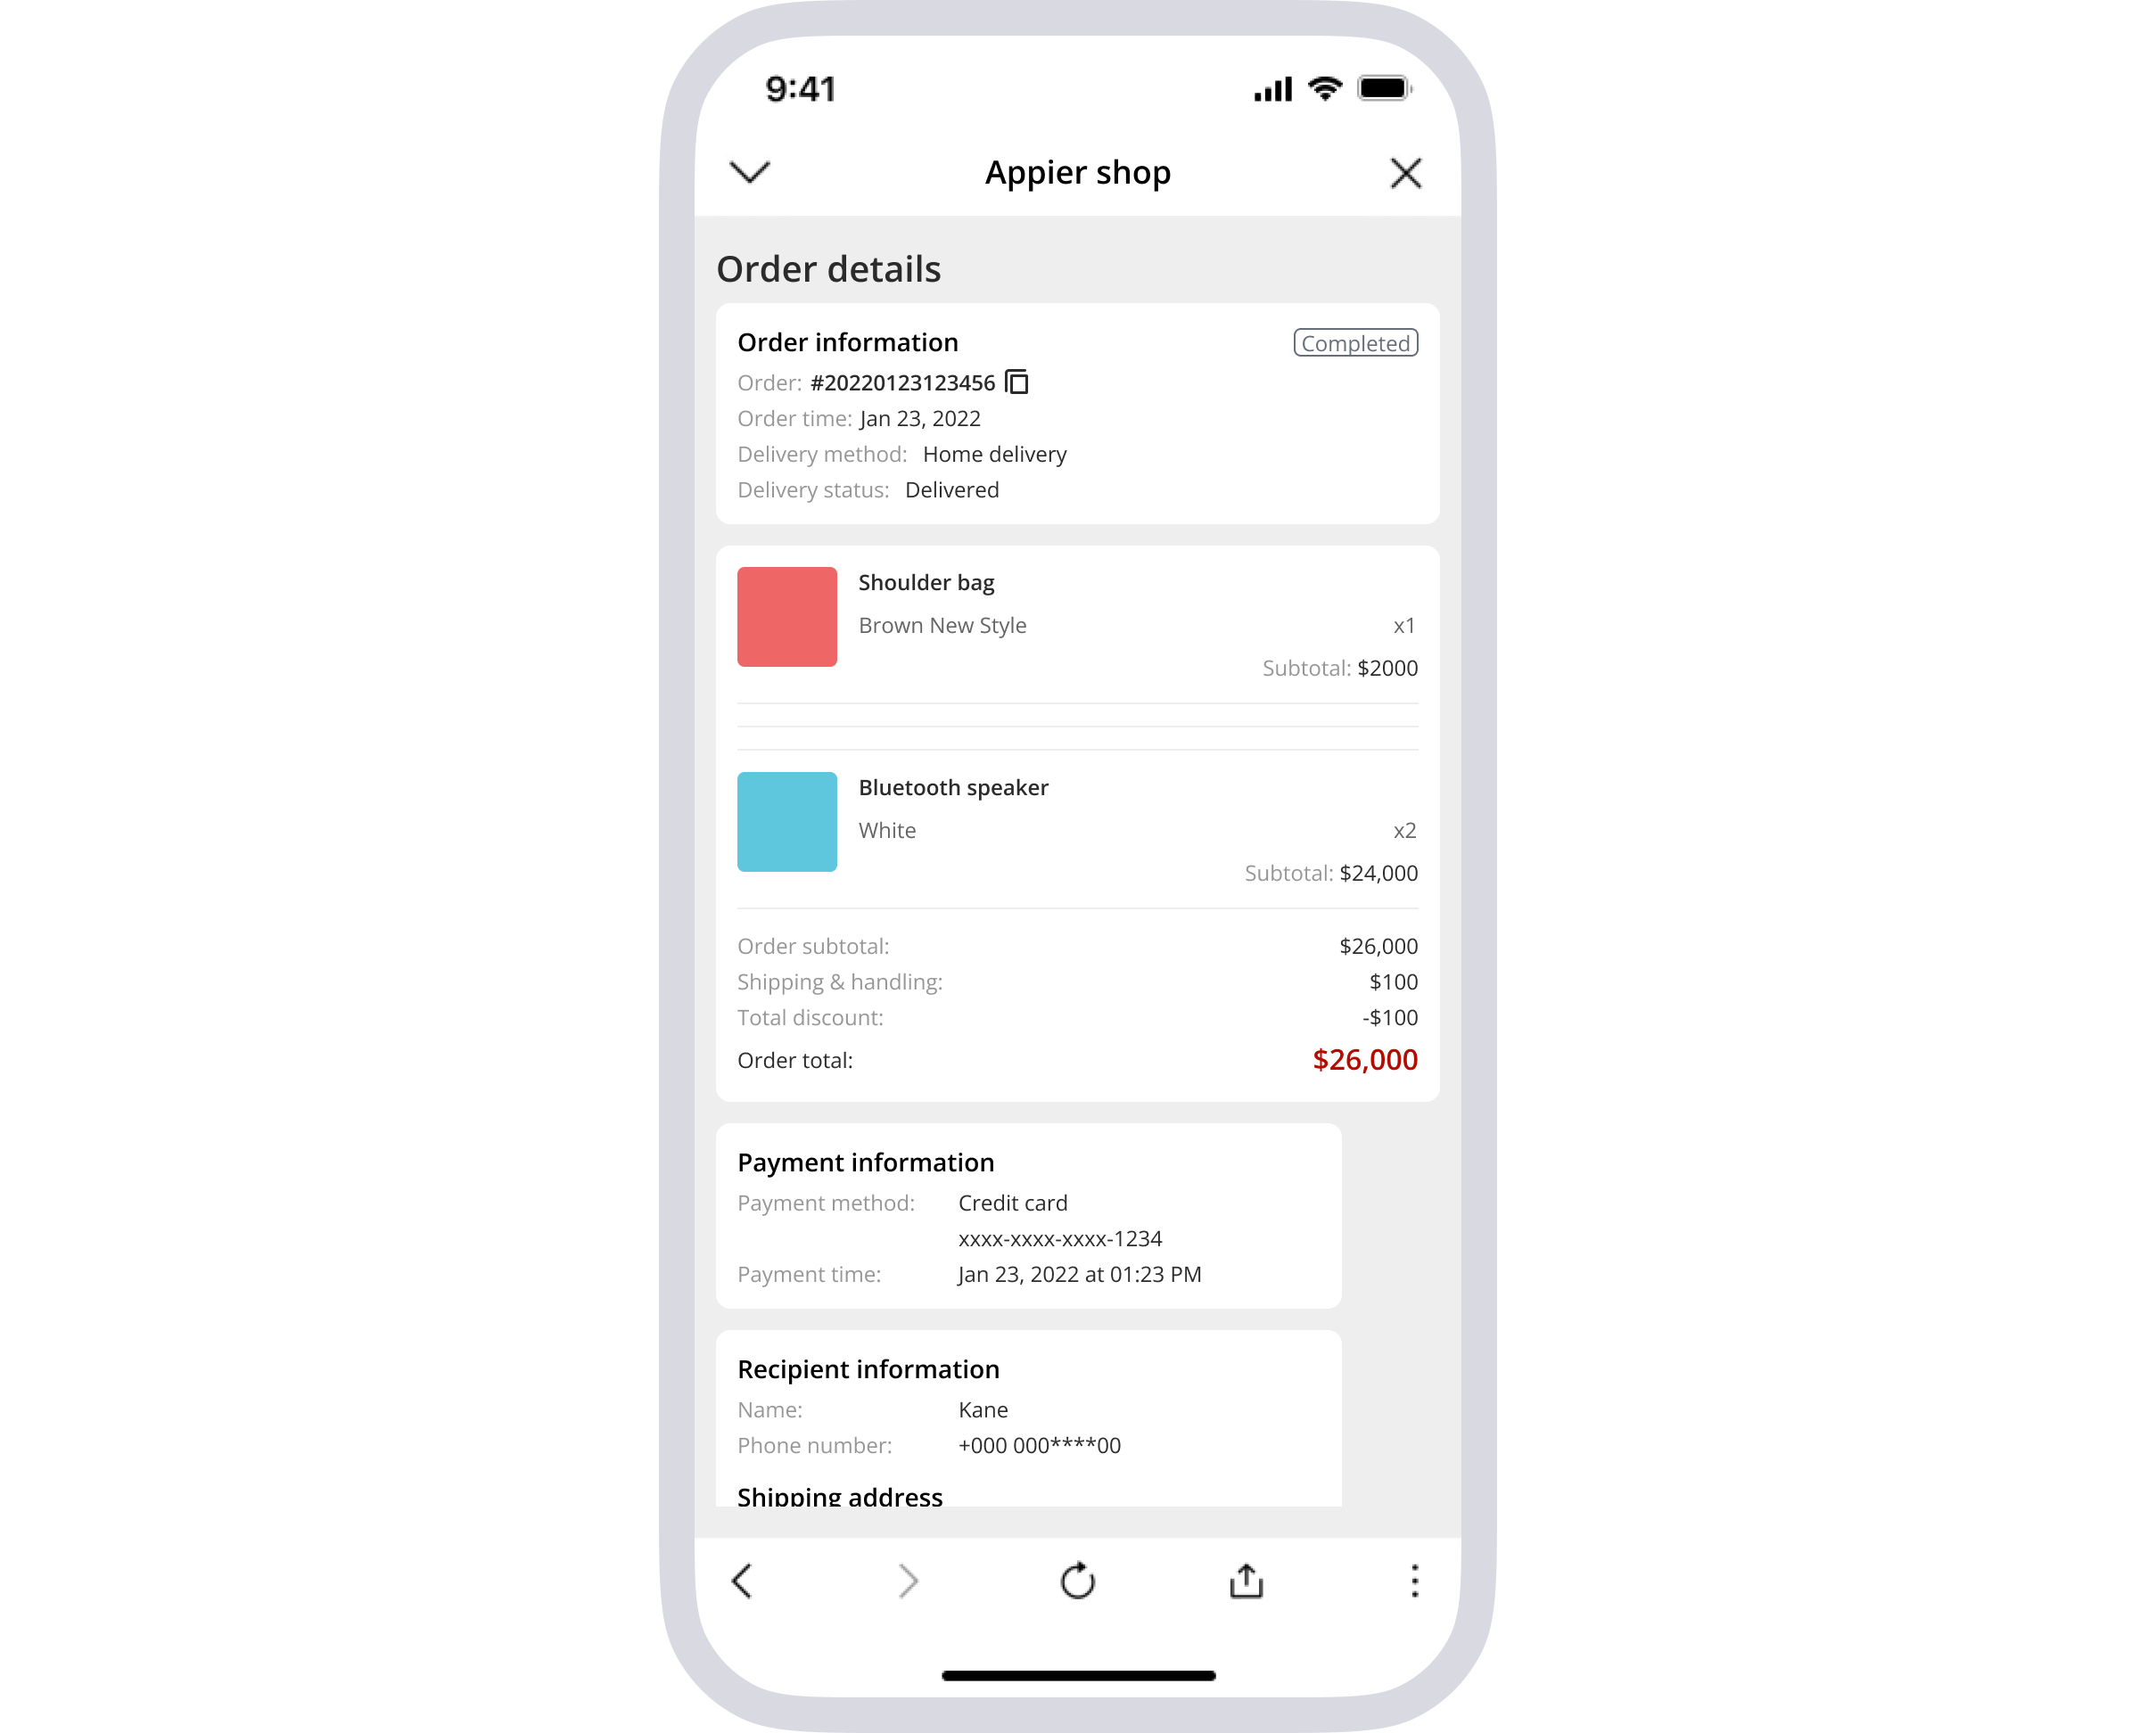
In addition, your customer service agents will also have access to users' order history in the console's live agent chat, allowing for more efficient and personalized customer service.
- Order history is visible directly from the chat console
- Cyberbiz, SHOPLINE: 90 days of purchase history
- 91APP: 14 days of purchase history
- To quickly view older order history, a link to the e-commerce service is provided
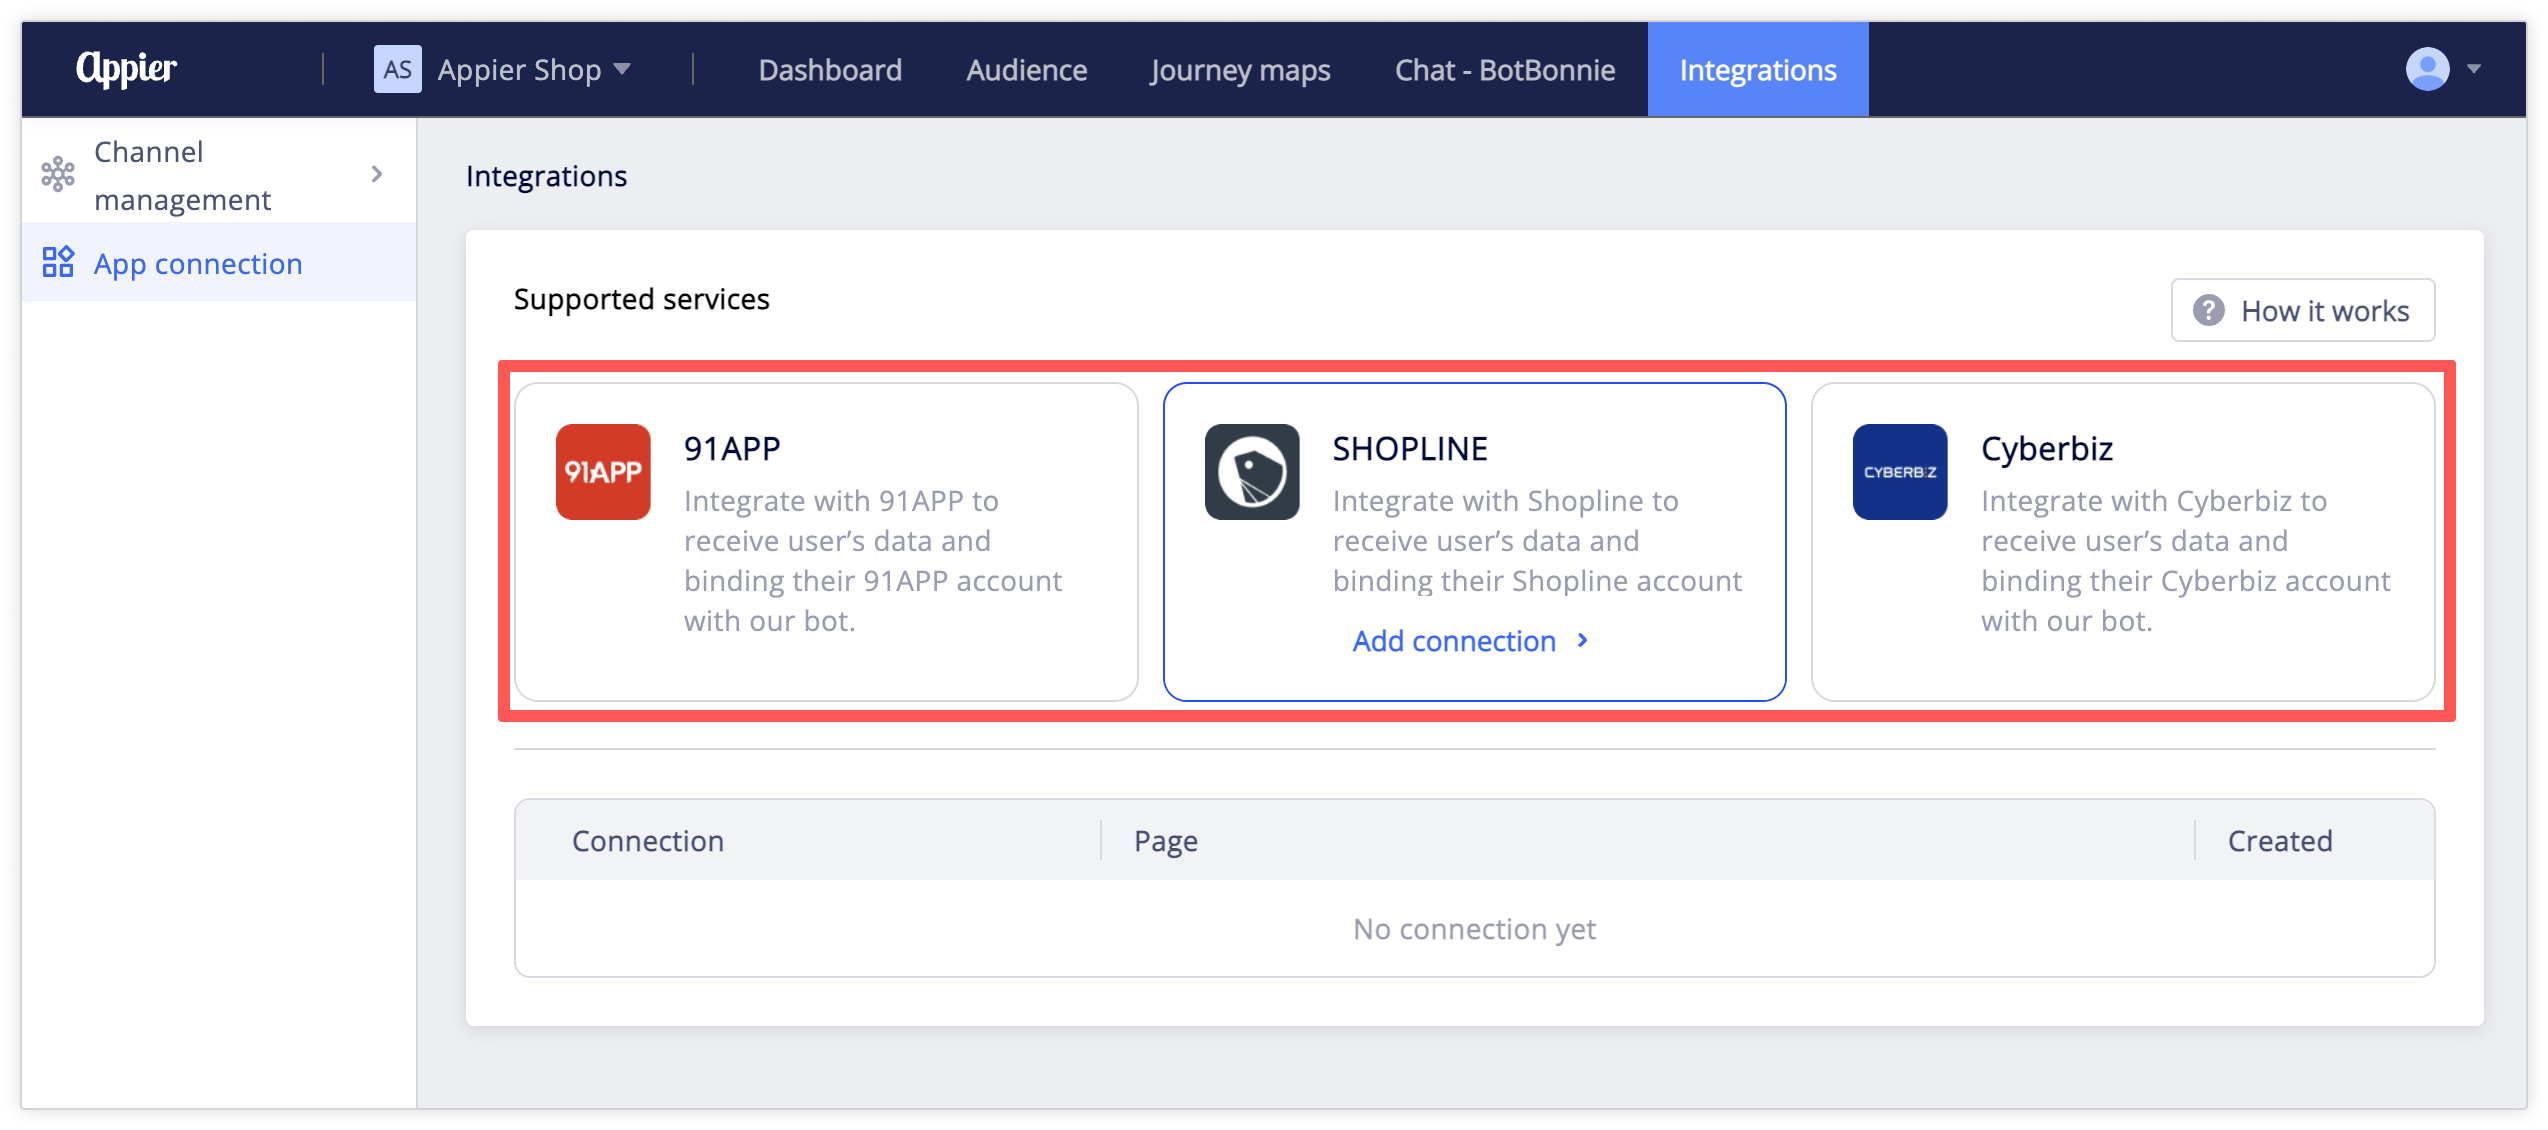
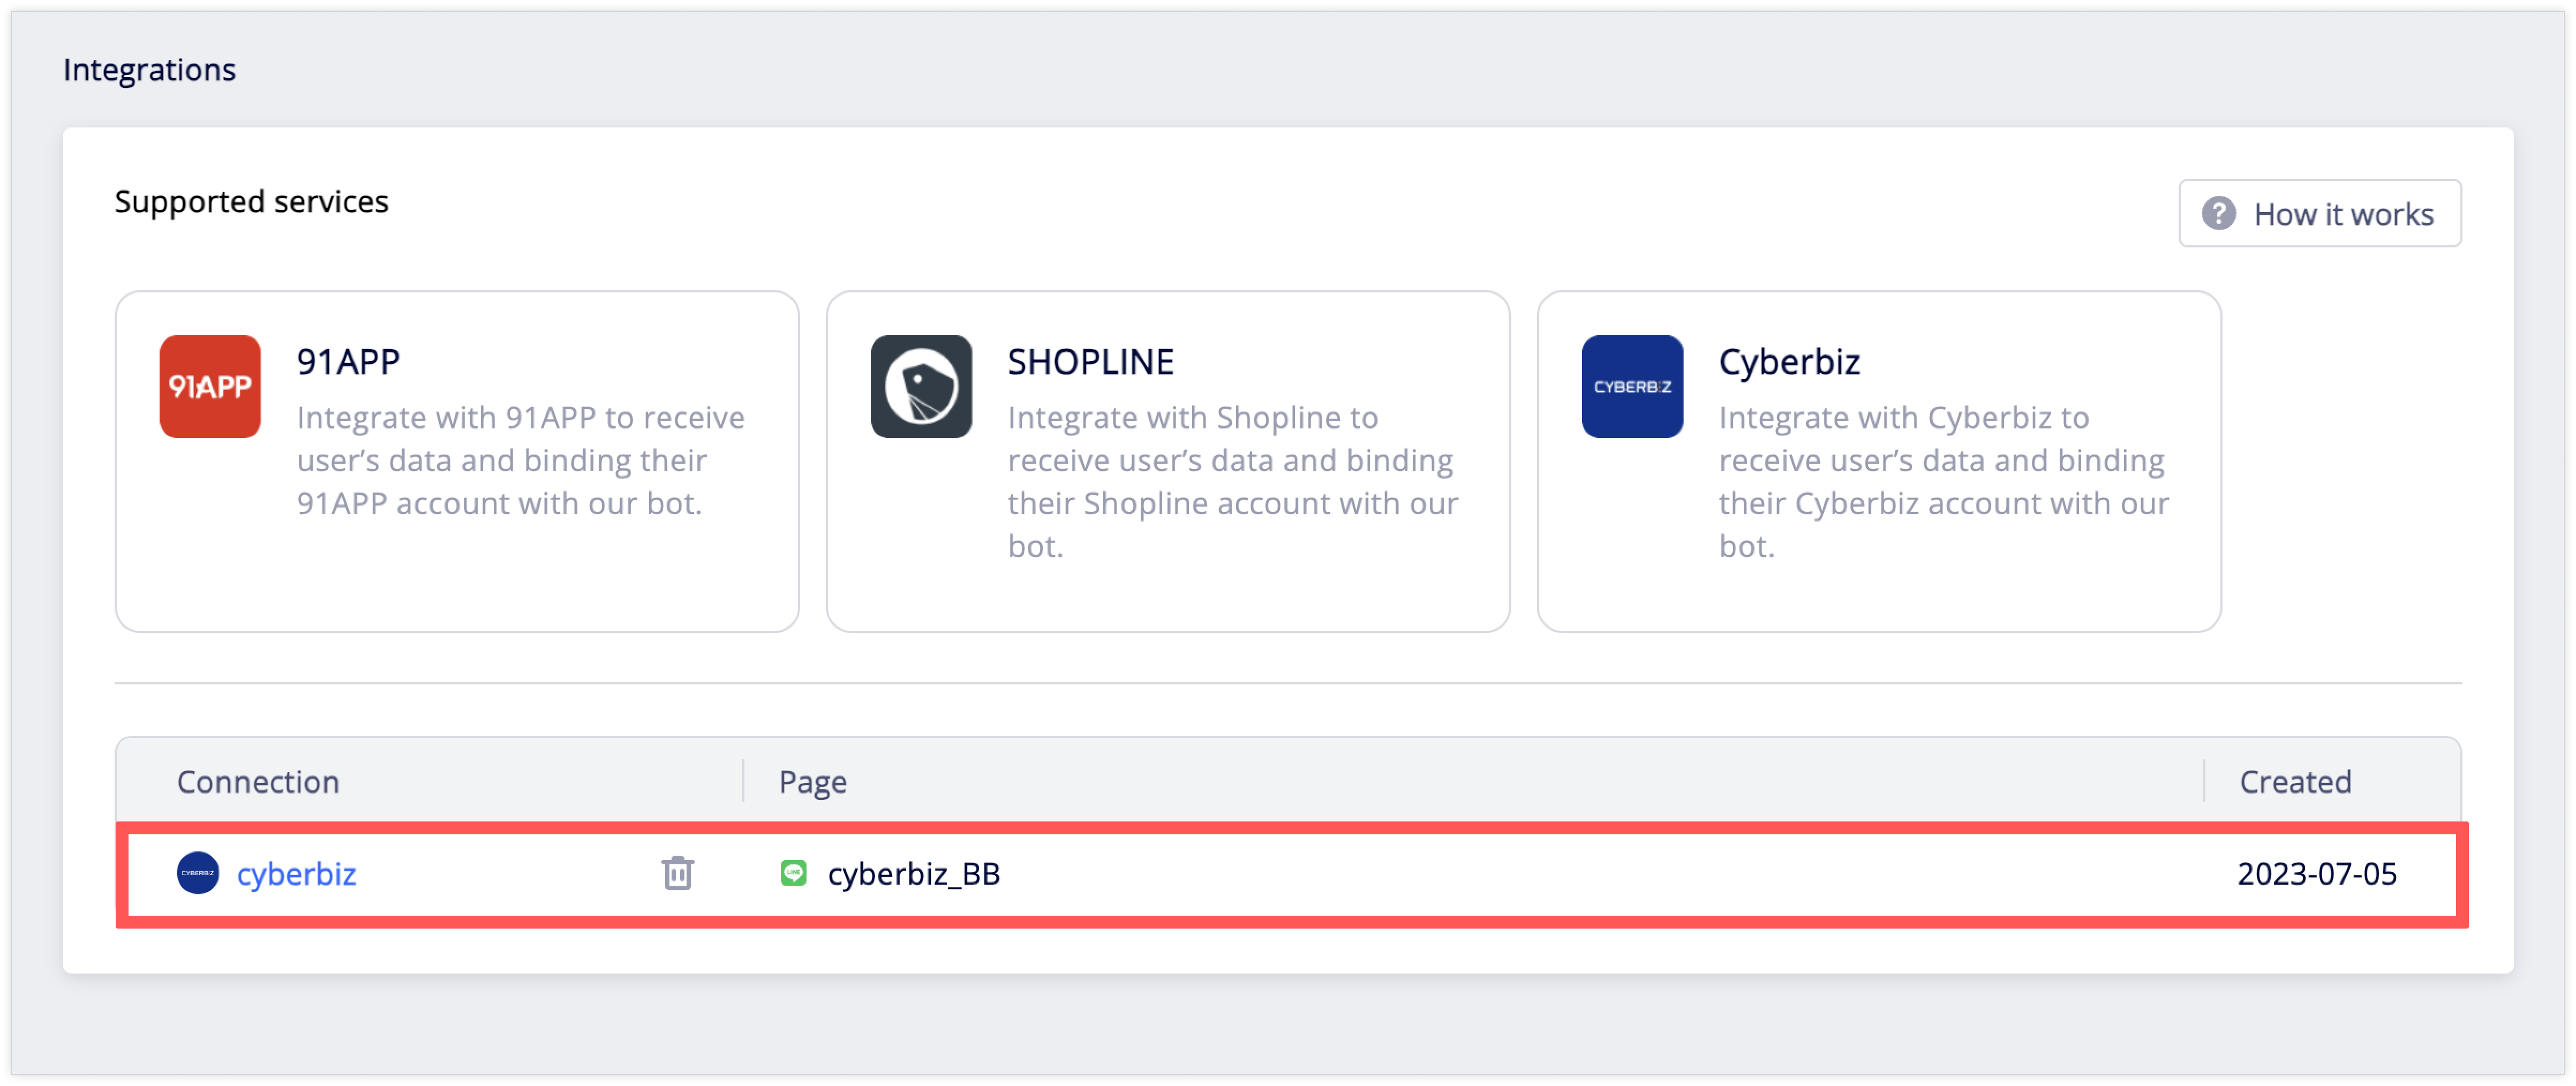
1. Add a connection to a third-party service
Go to Integrations > App connection. Under Supported services, click on the icon corresponding to the service you'd like to add a connection for.
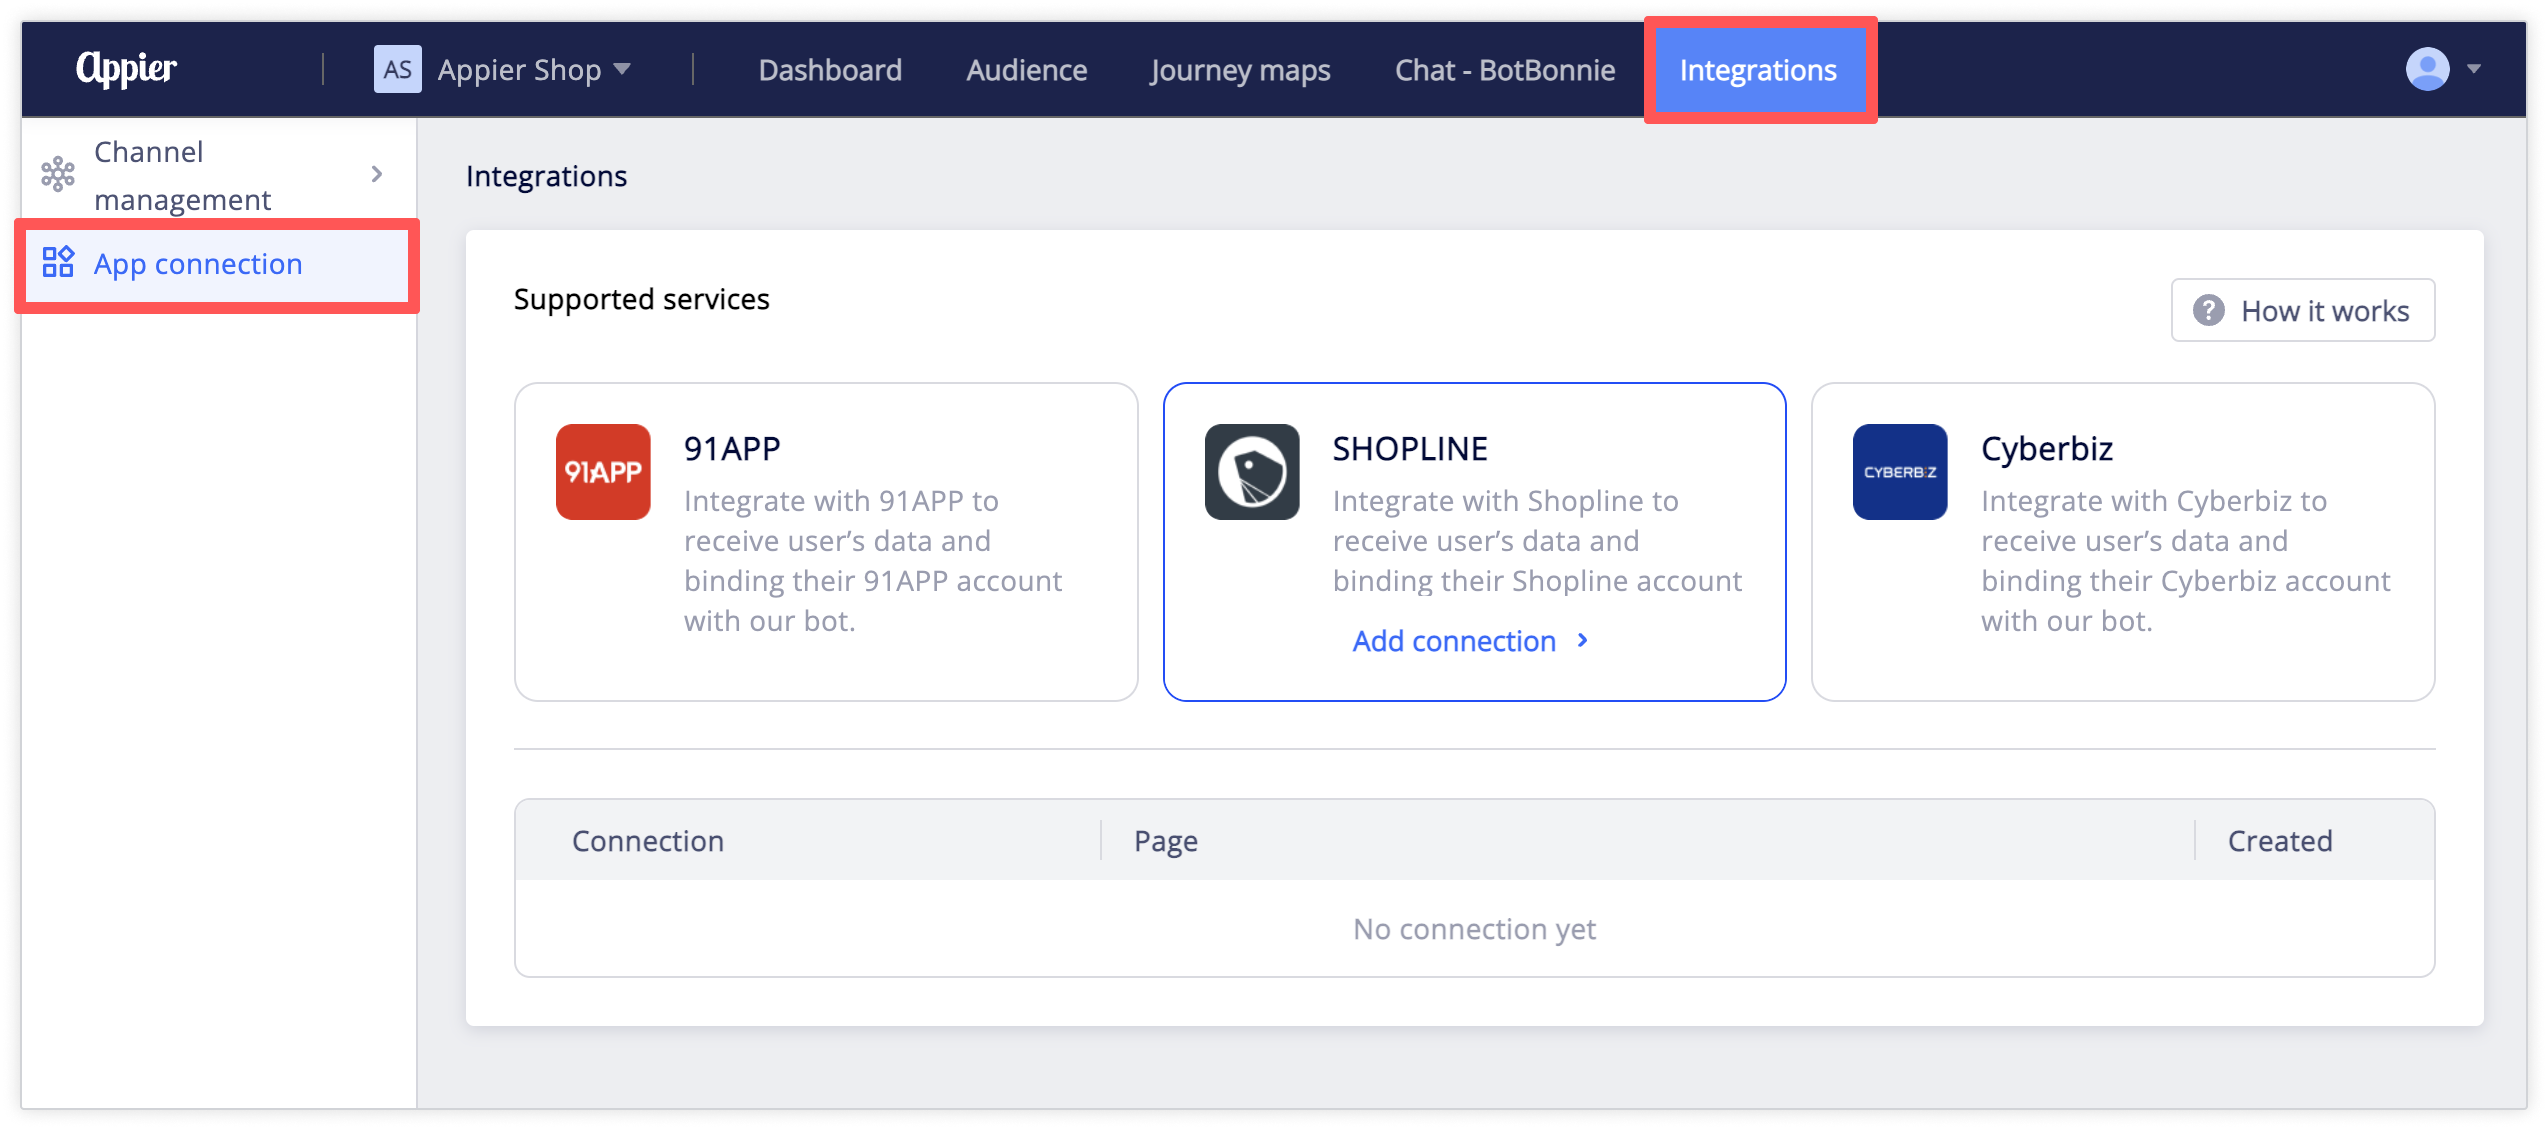
Complete the required connection settings, then click Save to add the connection.
2. Add a button to trigger account linking
User flow
Users must complete the account linking process through your BotBonnie chatbot before they can access third-party service features.
This is what the account linking flow looks like to your users:
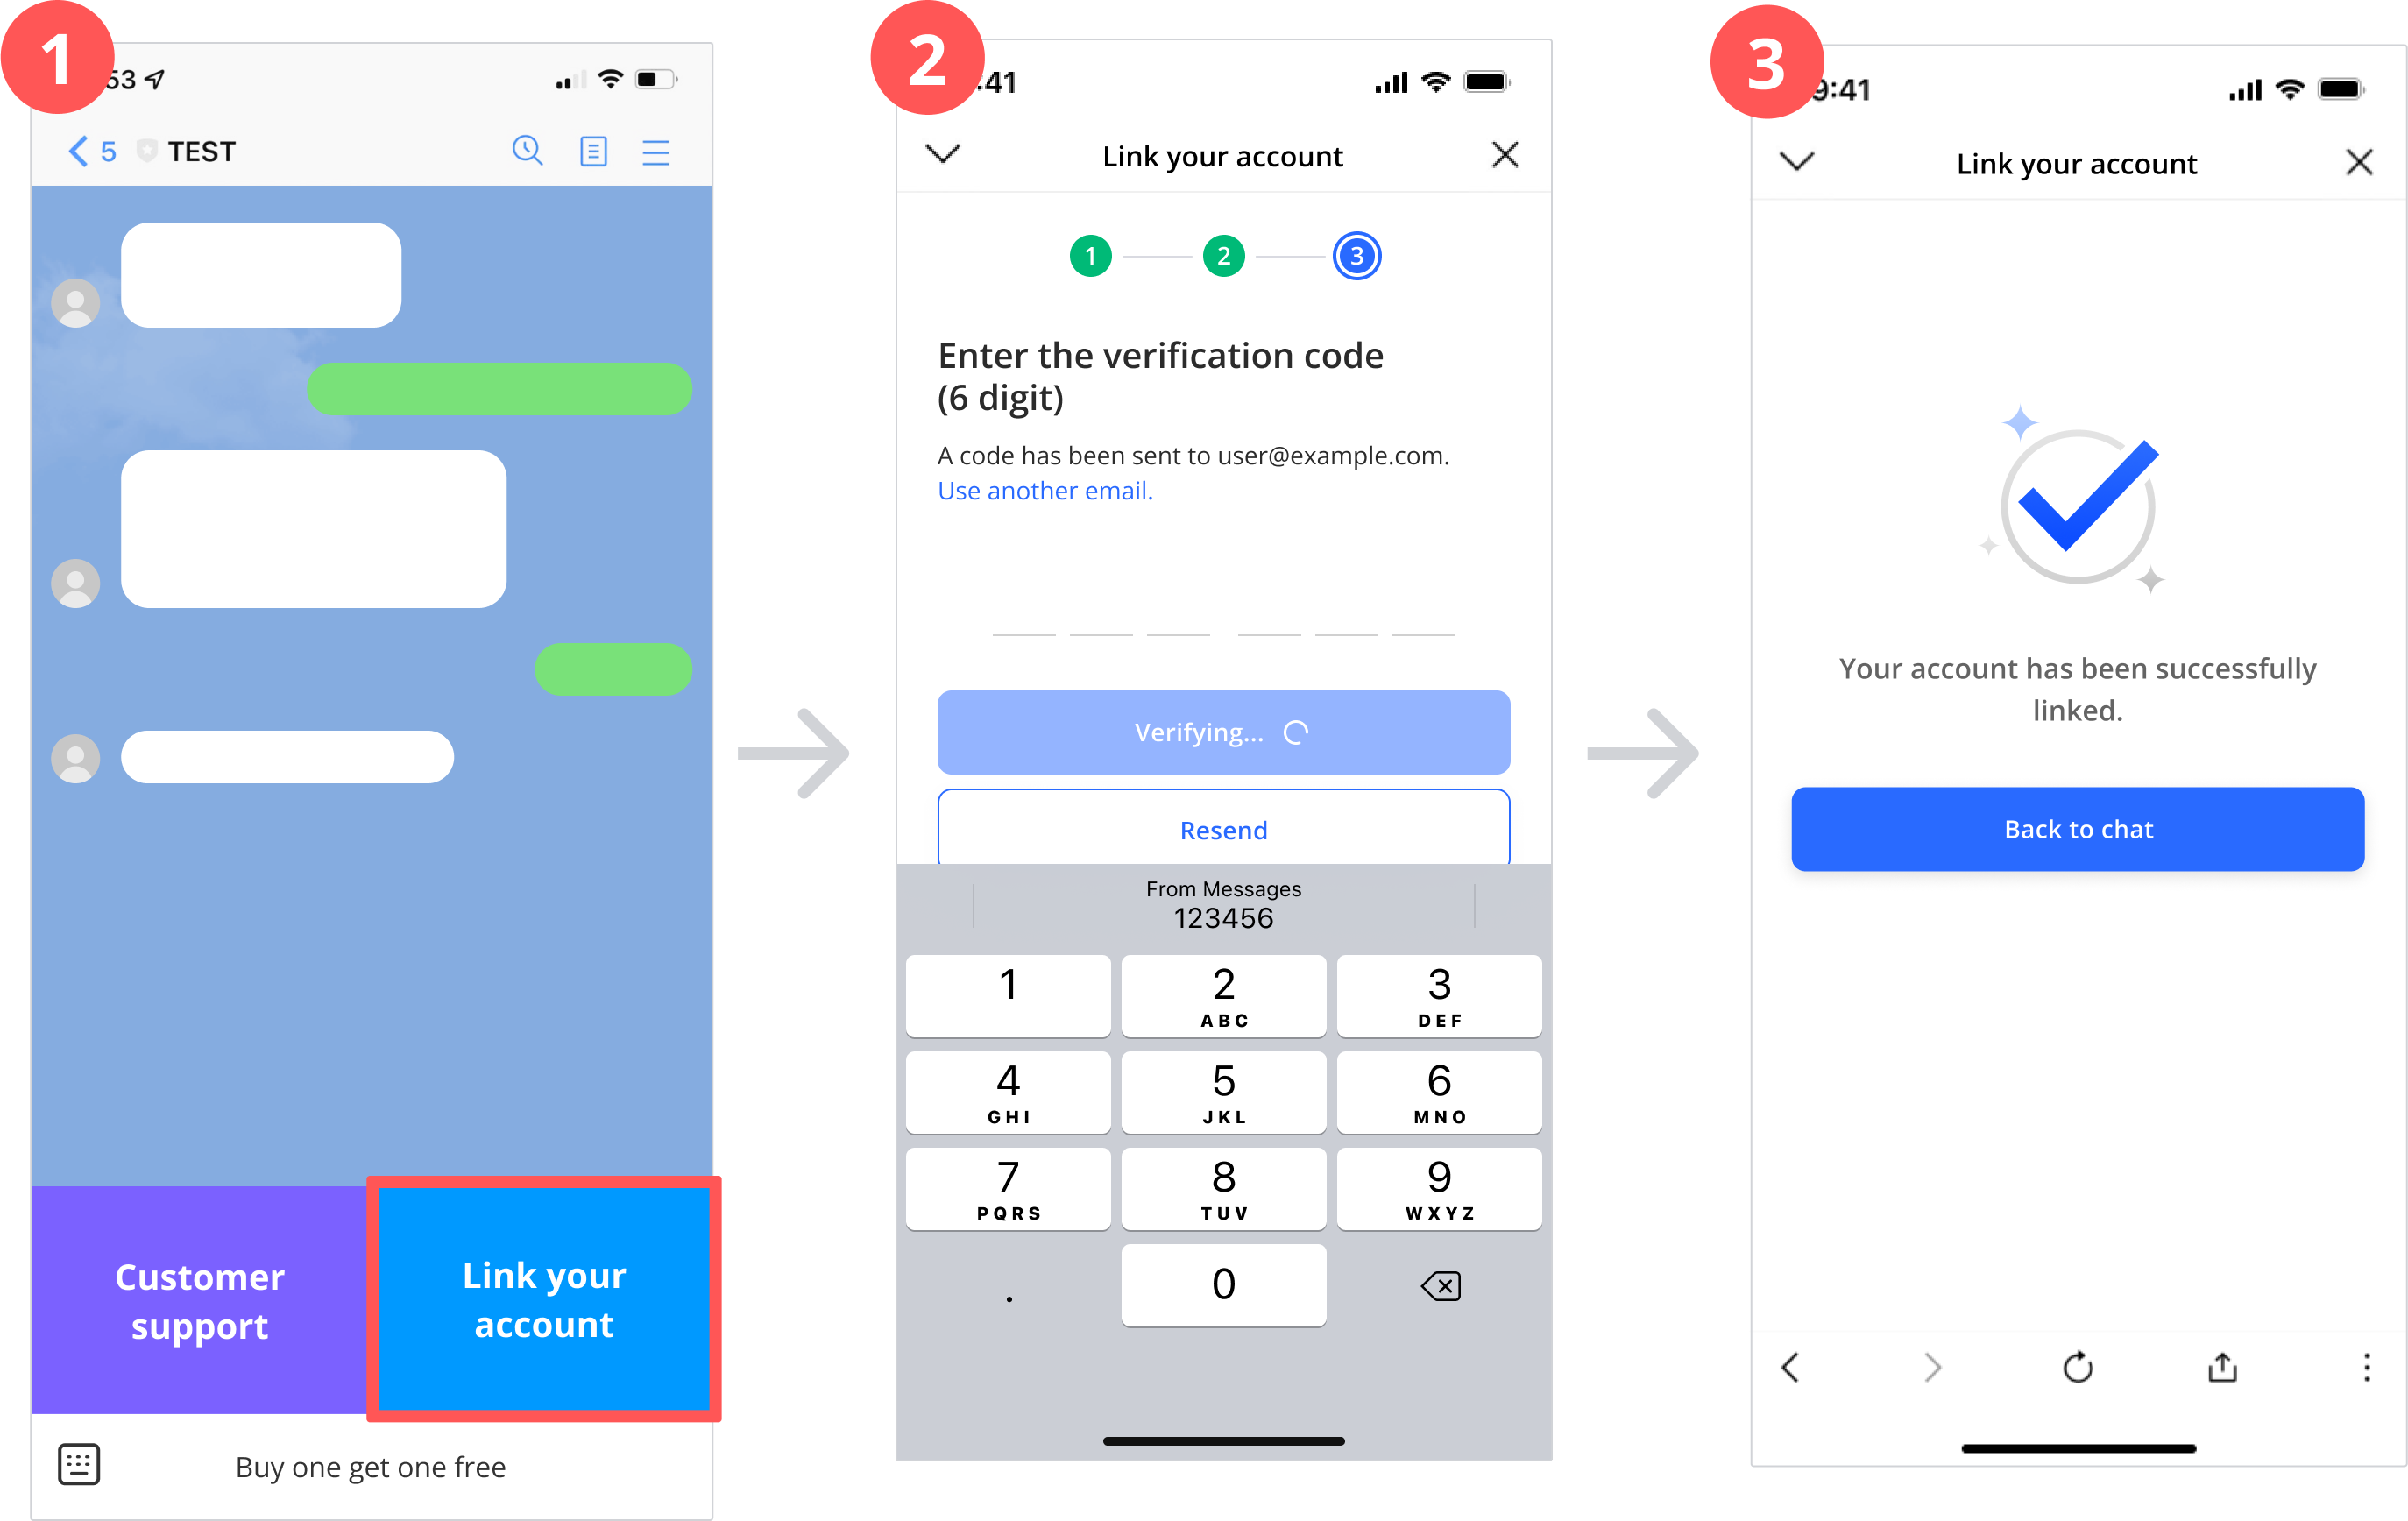
| Step | Details | |
|---|---|---|
| 1 | The user clicks on the button that triggers the account linking flow. | This button can be configured in your flows (Chat > Flows). The third-party service may require the user to agree to their terms and conditions before the proceeding. |
| 2 | The user is prompted to verify their identity. | Users can verify their identity via SMS or email verification code, depending on the connection settings you configured. If the user's identity isn't recognized by the third-party service, the user will be prompted to create an account with that service. |
| 3 | The user's identity is confirmed, and the account linking process is complete. | After the user's identity is confirmed, they'll have access to e-commerce integration features. |
The account linking process can be initiated via chatbot flows or LINE menus:
- Account linking via chatbot flows
- Account linking via LINE menus
- Account linking via Messenger menus
Account linking via chatbot flows
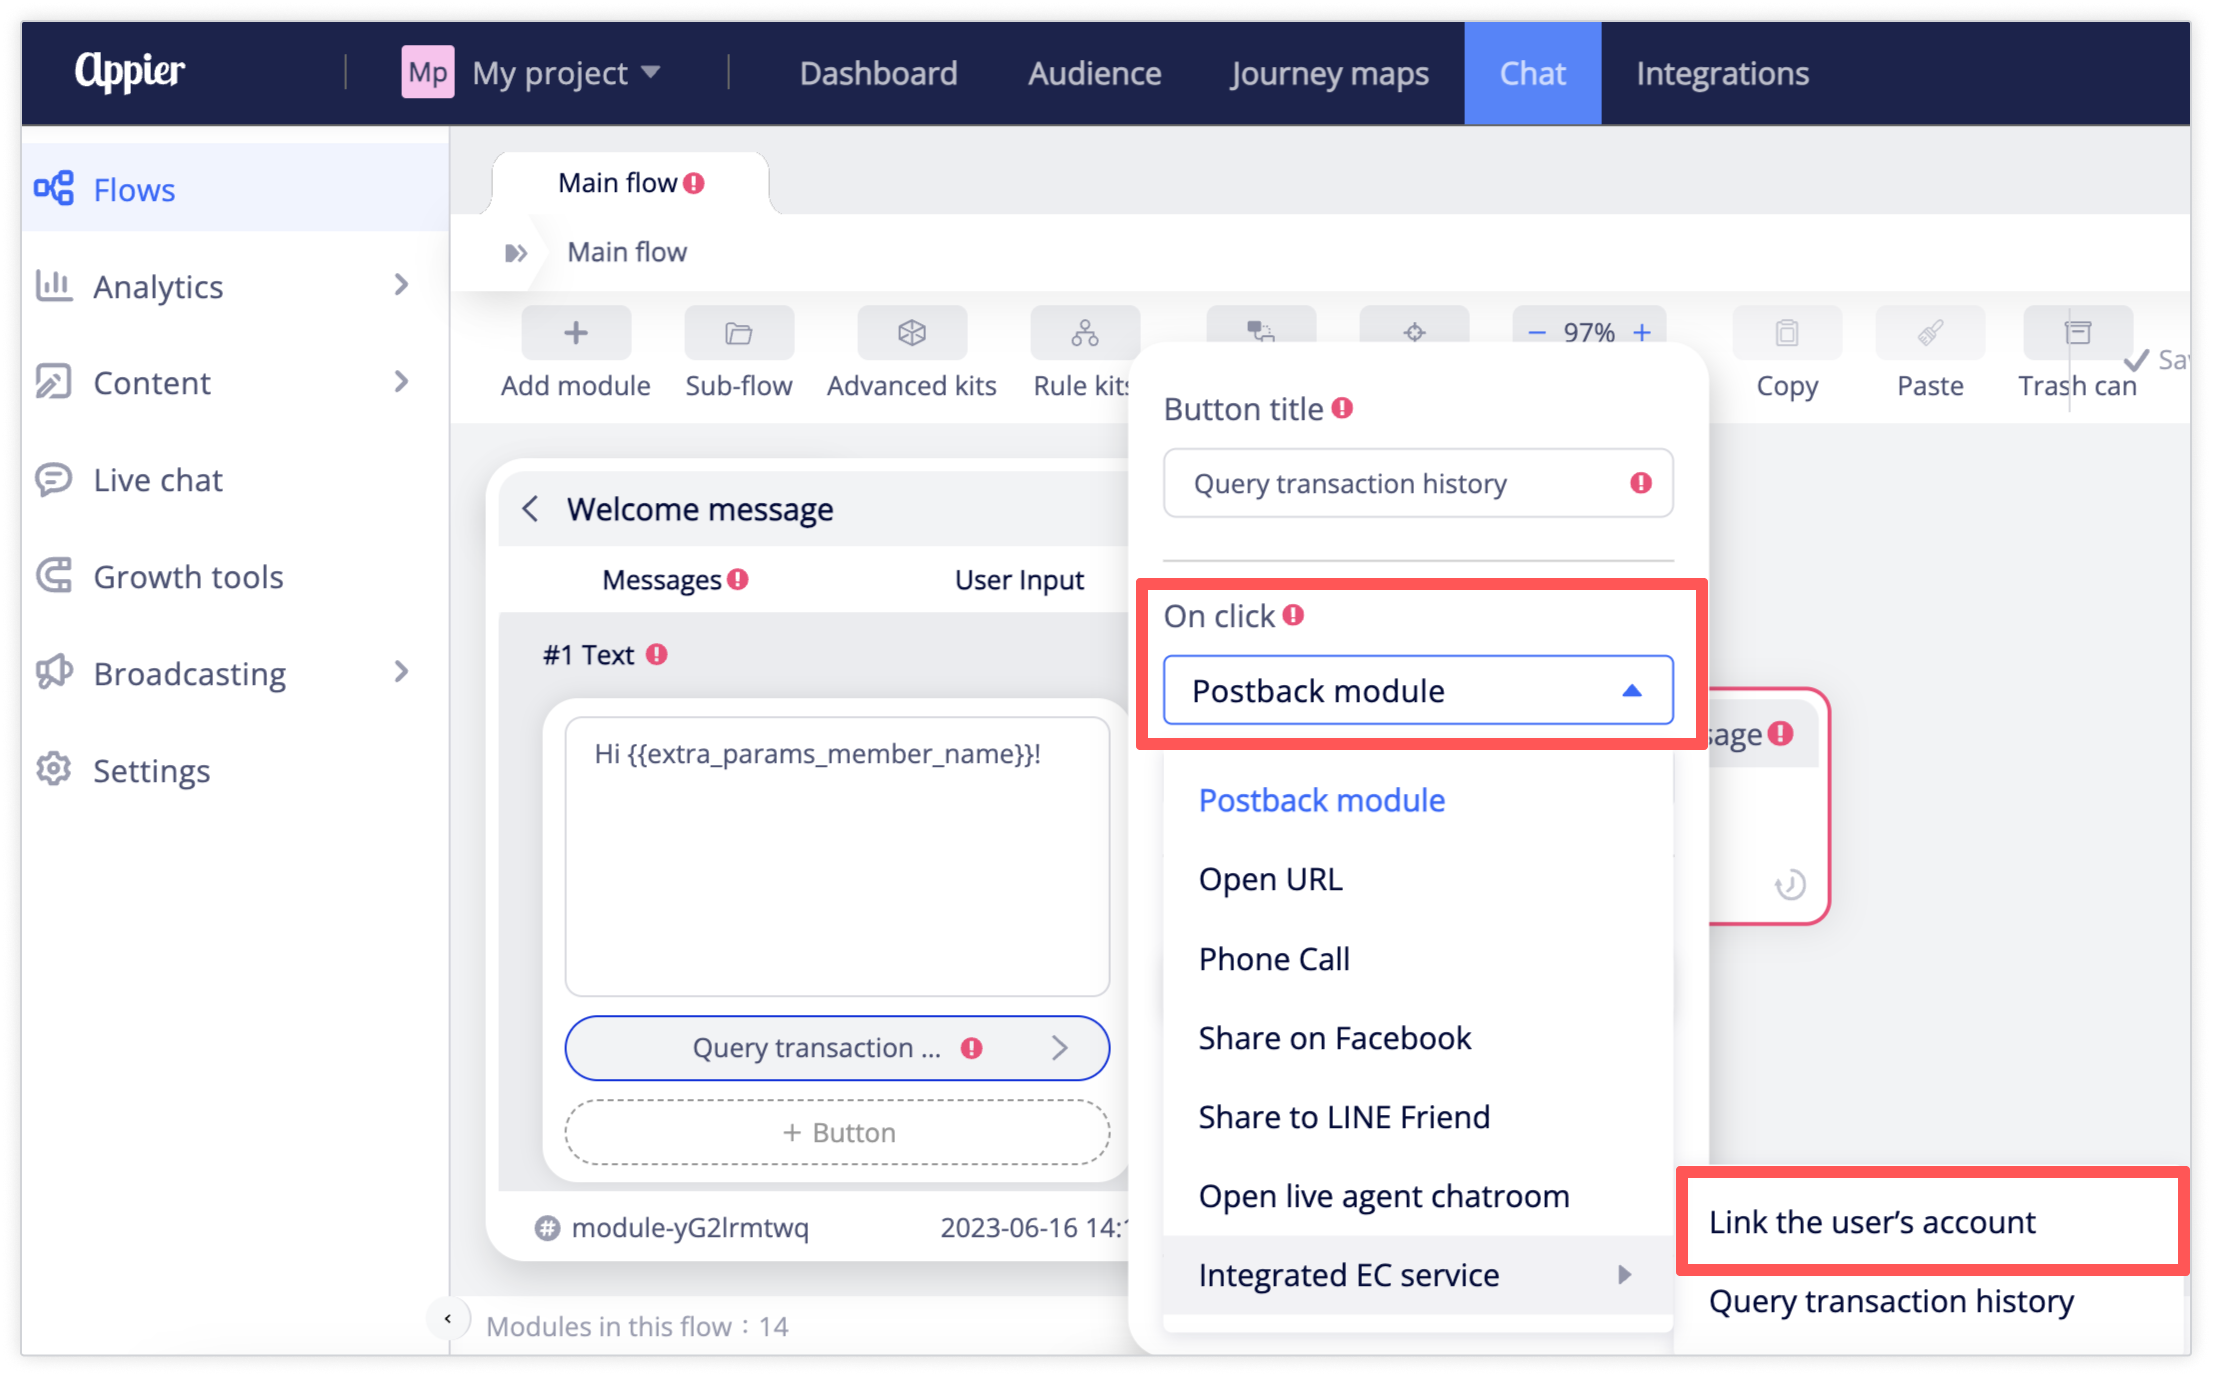
Go to Chat > Flows and select the module you'd like to use, then click + Button to add a new button.
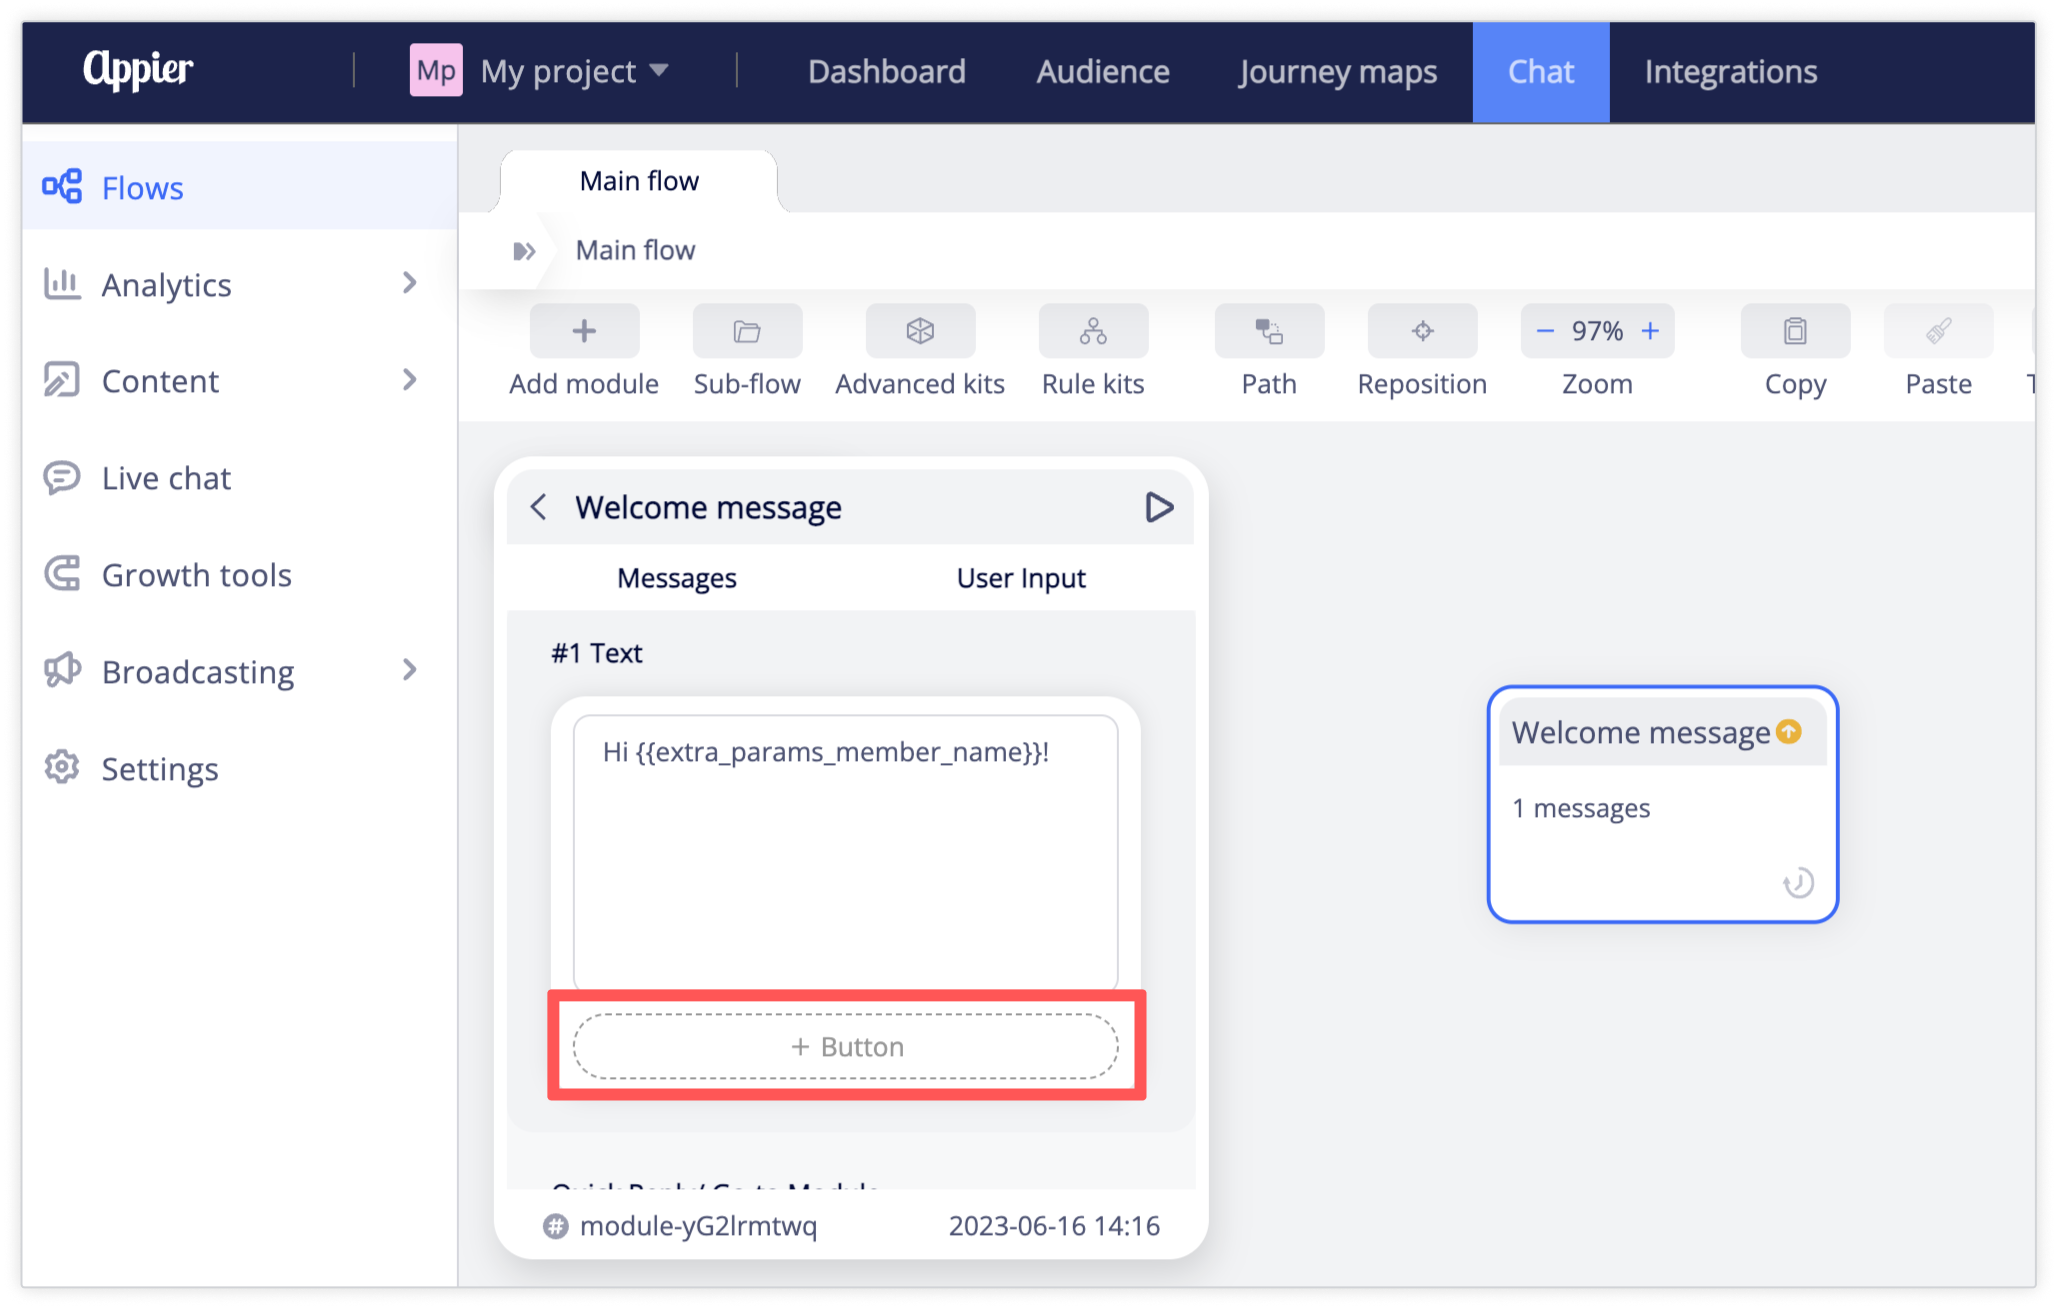
In the button settings, click the dropdown under On click, then select Integrated EC service > Link the user's account.
Account linking via LINE menus
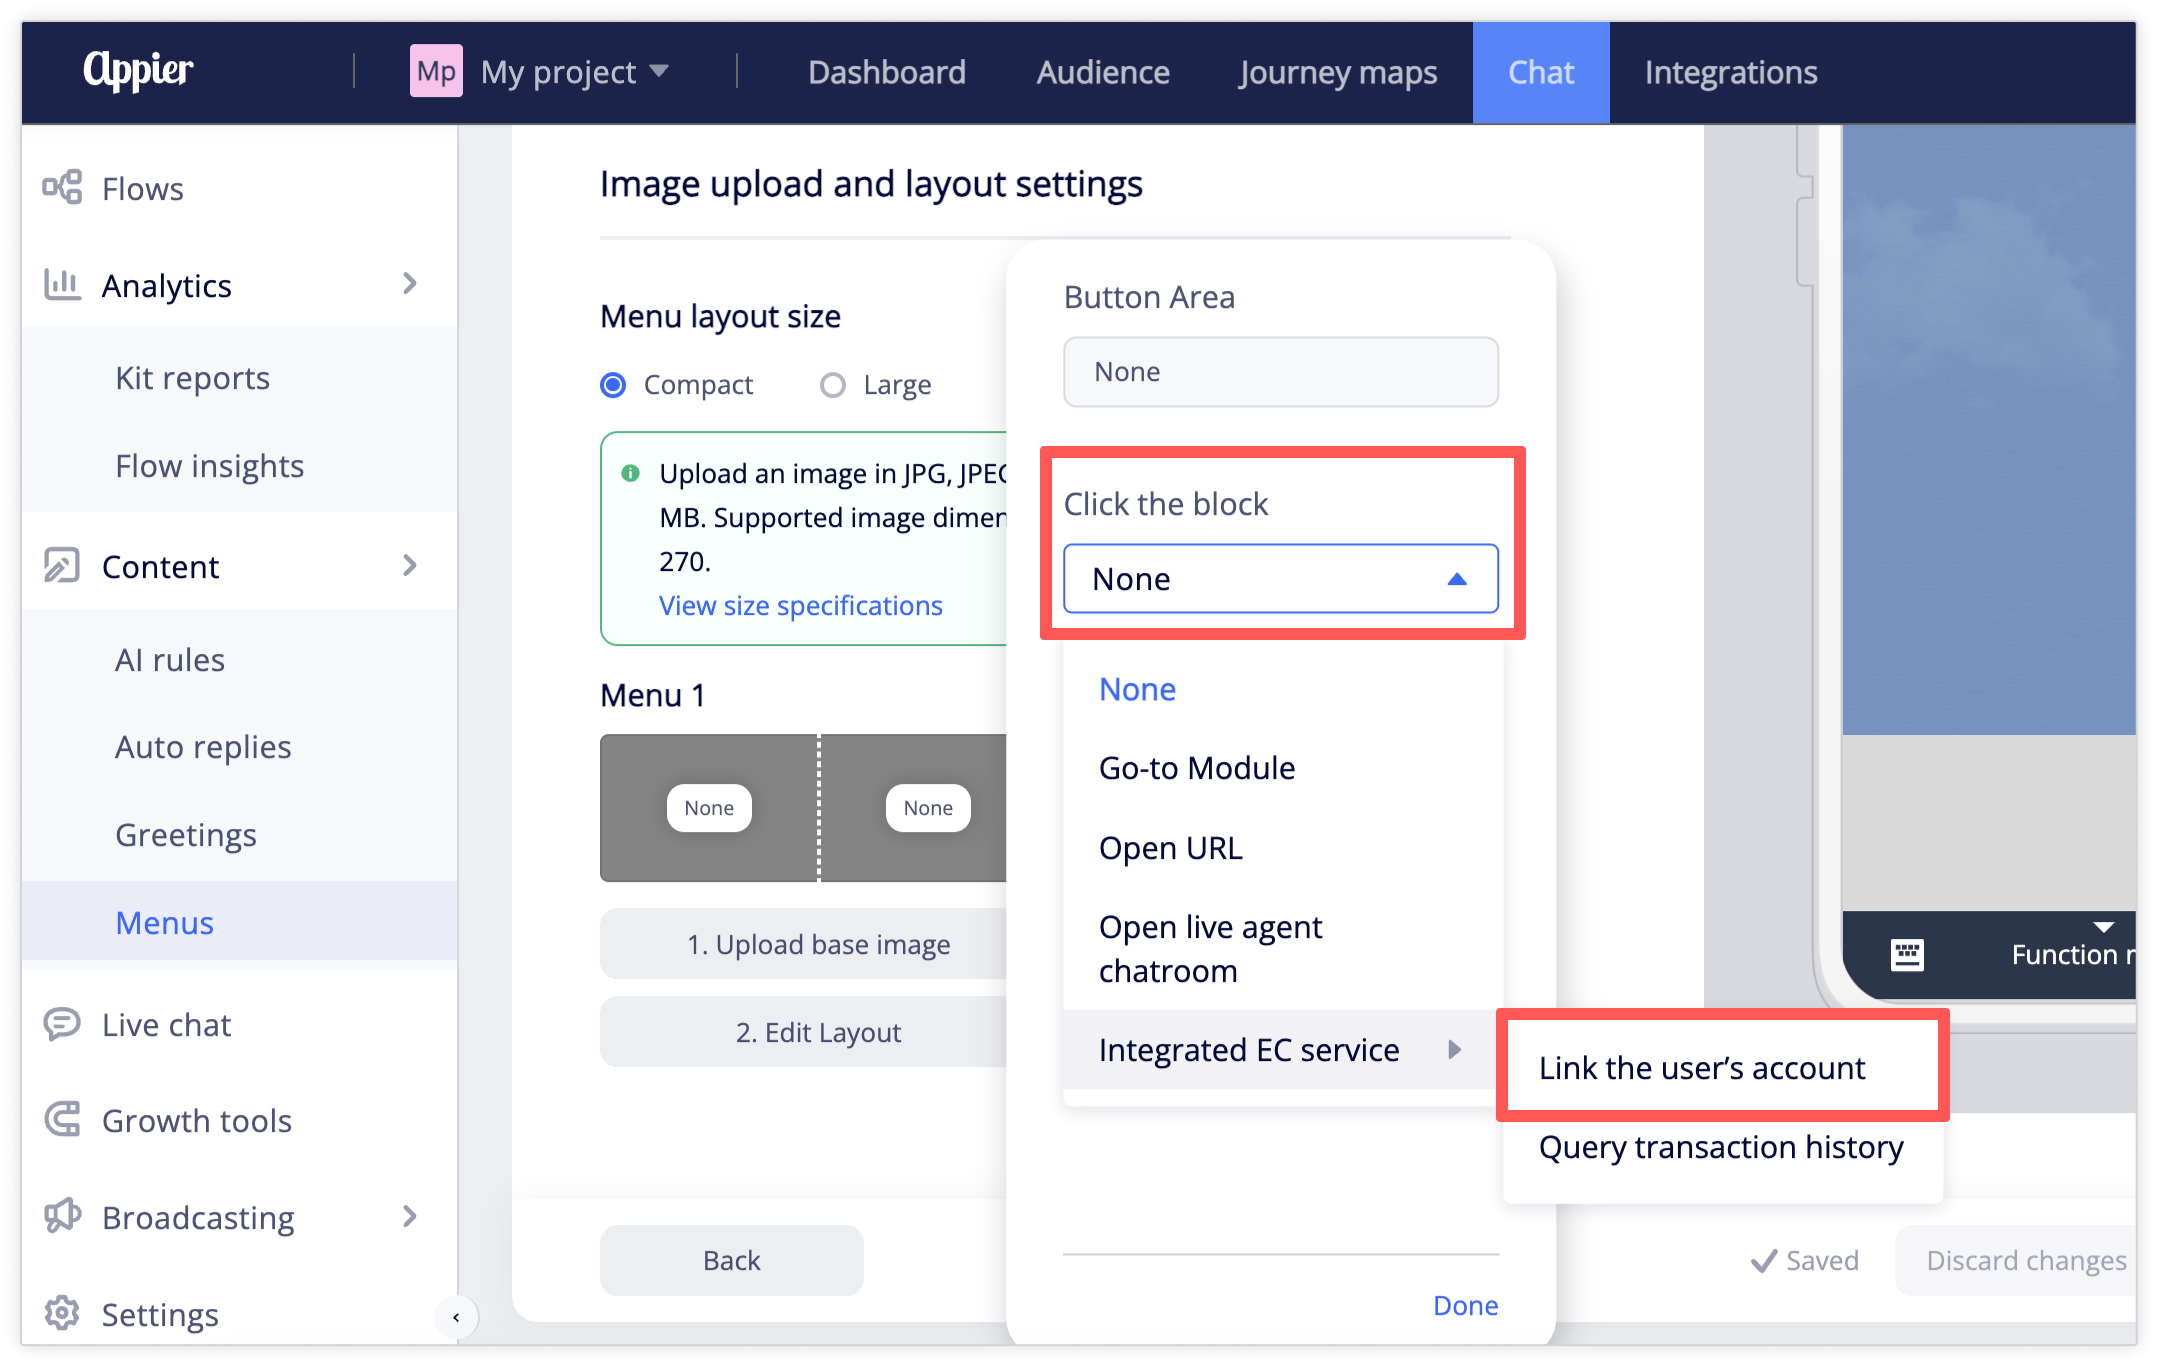
Go to Chat > Content > Menus and open the LINE menu you'd like to edit.
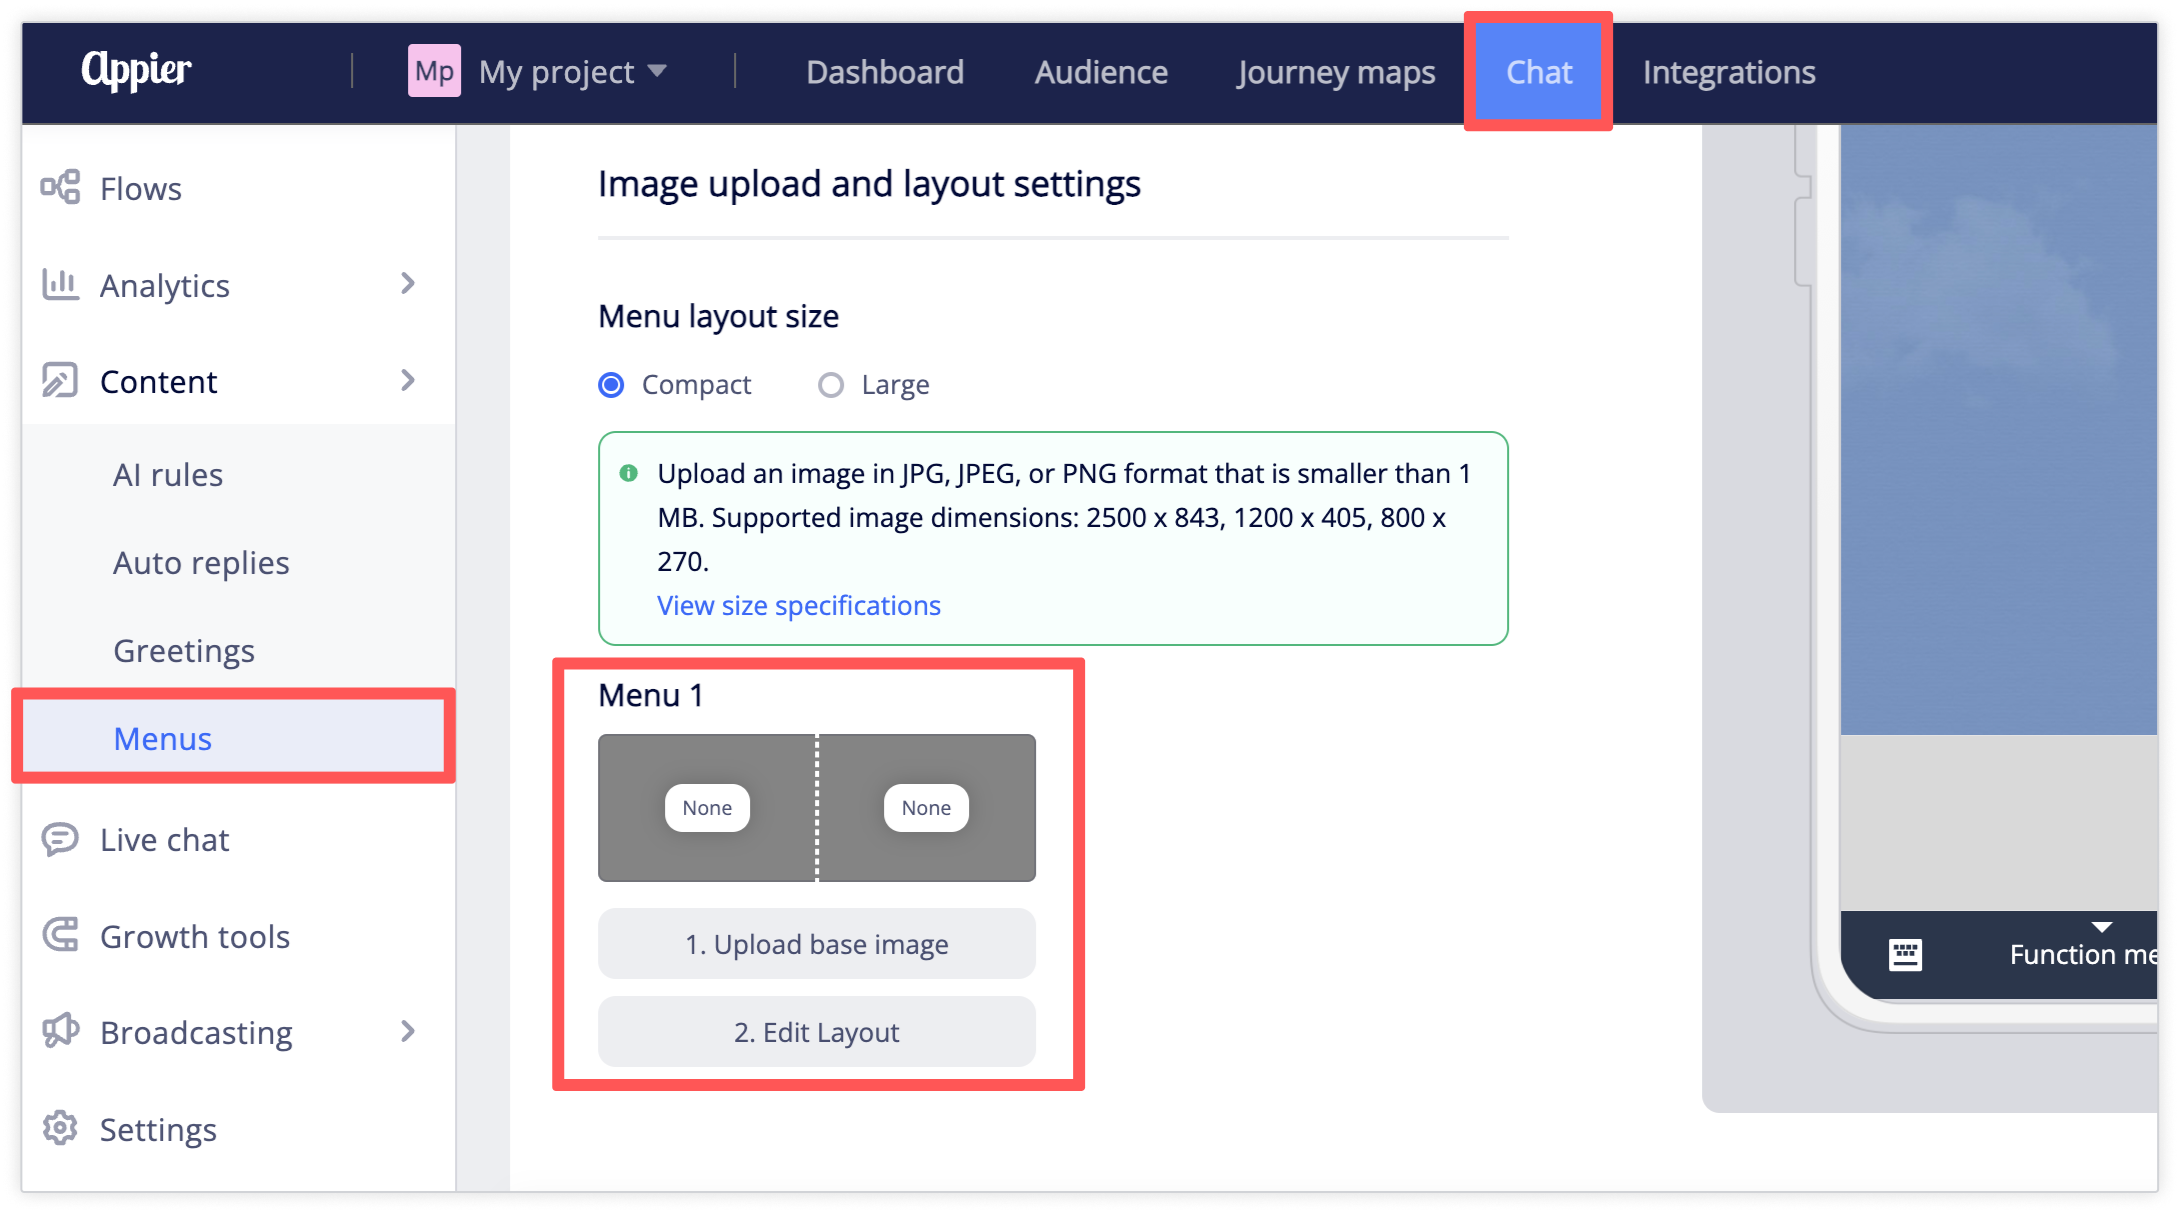
Under Image upload and layout settings, click the button area you'd like to use, click the dropdown under Click the block, then select Integrated EC service > Link the user's account.
Account linking via Messenger menus
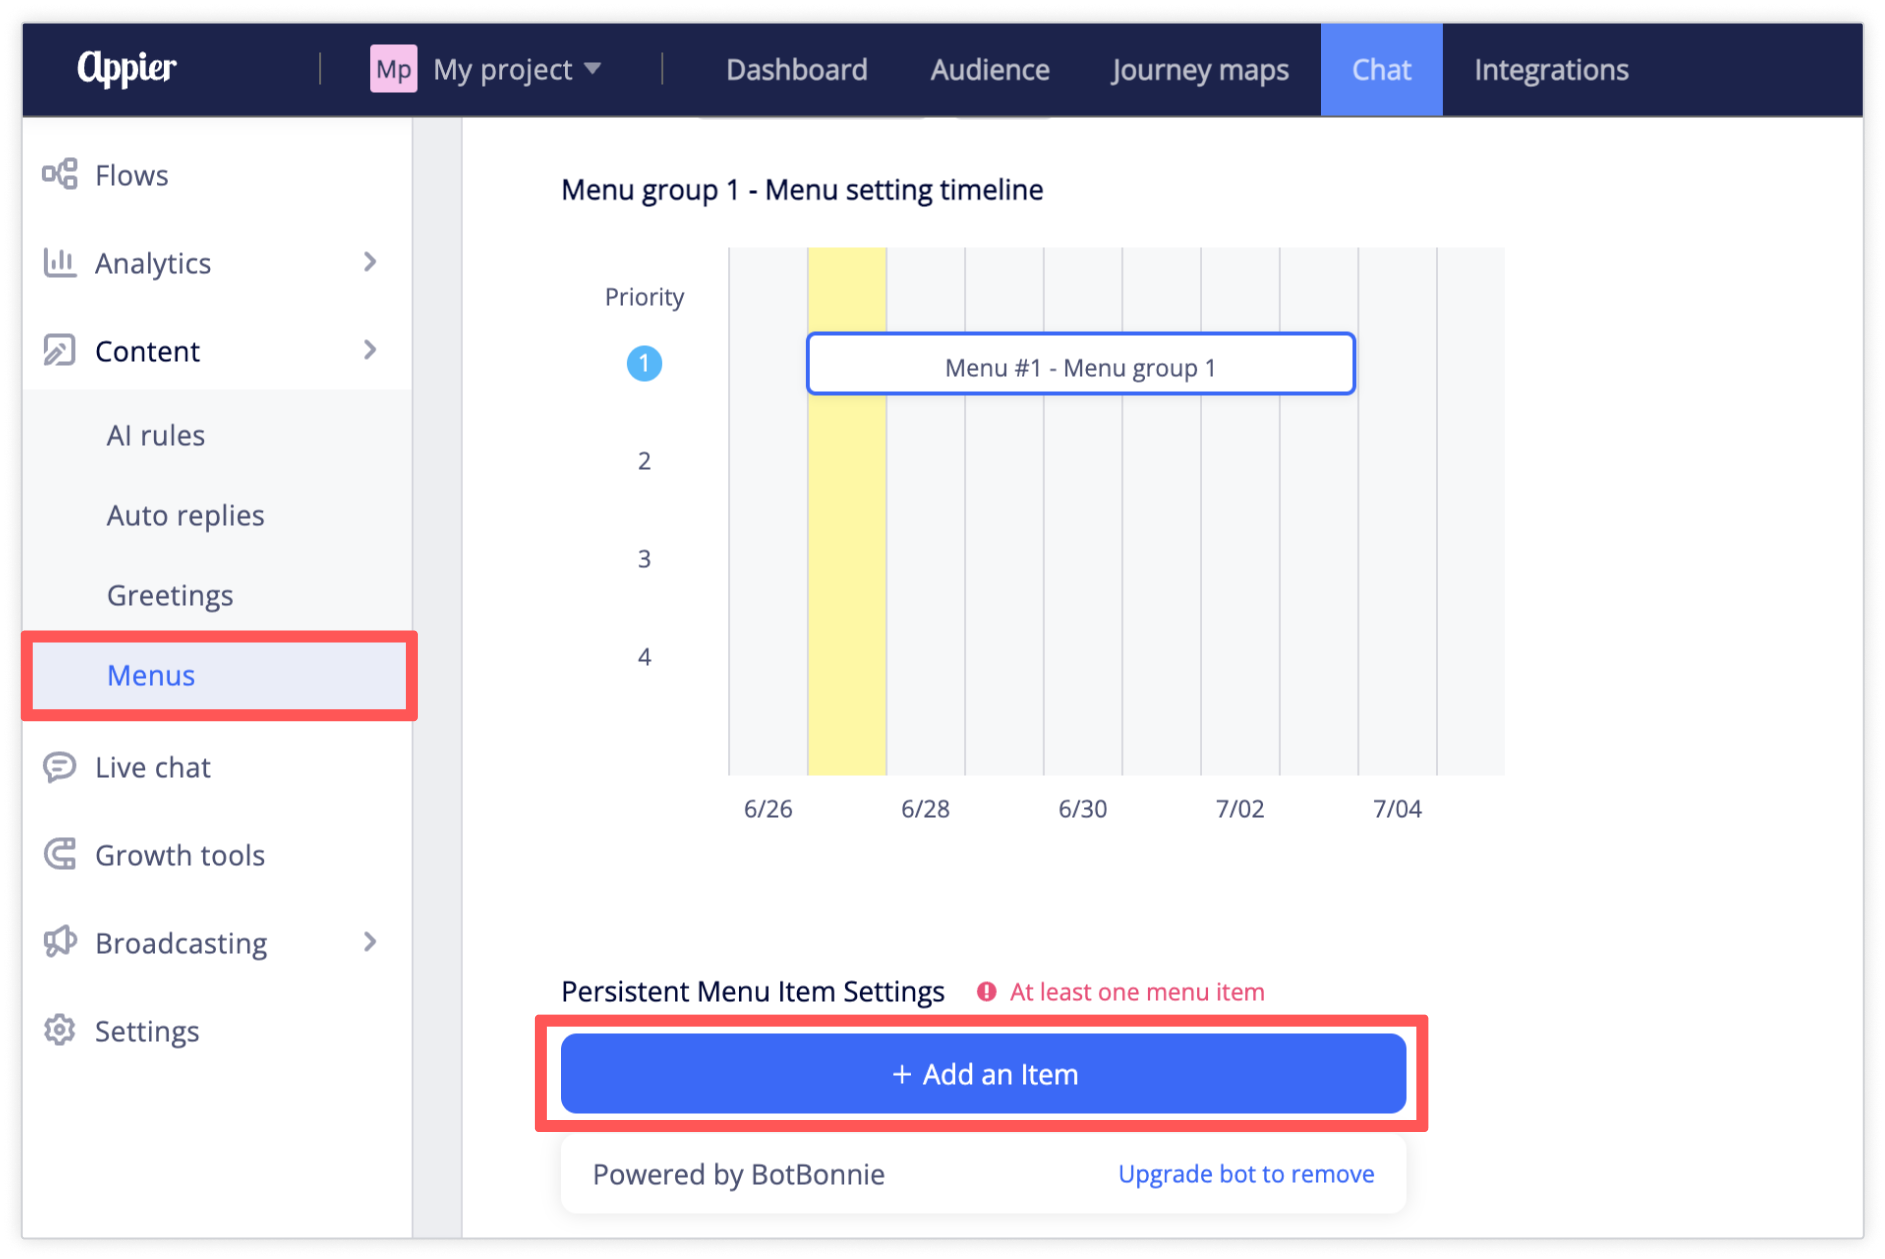
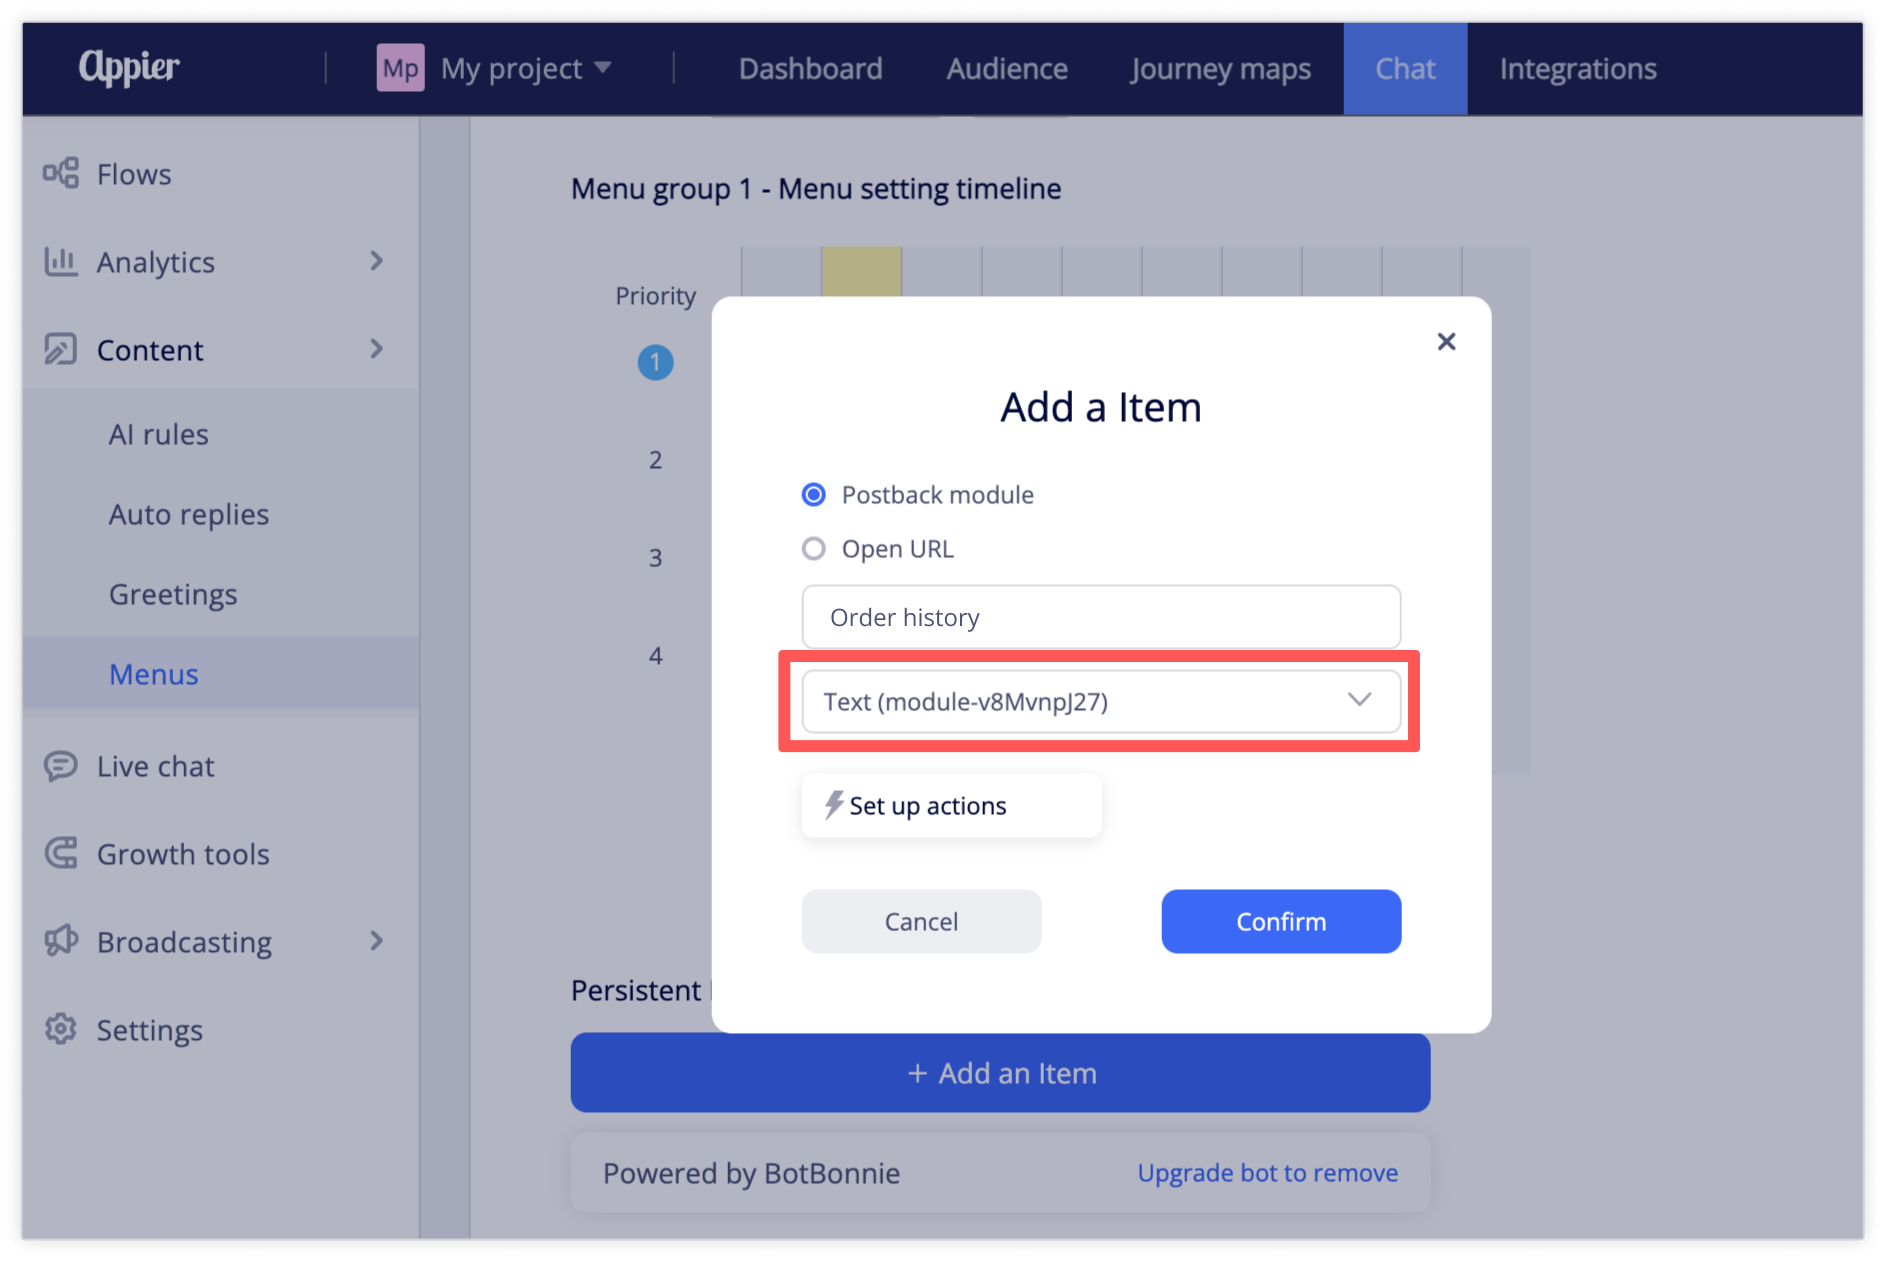
First, create the flow module that includes the button for account linking. Next, to Chat > Content > Menus and open the Messenger menu you'd like to edit.
Under Persistent menu item settings, click Add an item:
Name the menu item, then select the flow module you created from the dropdown menu.

3. (Optional) Add a button to query transaction history
After the user has successfully linked their account, they'll be able to query their transaction history directly from your chatbot. Transaction history can be accessed using chatbot flows or LINE menus:
- Query transaction history via chatbot flows
- Query transaction history via LINE menus
- Query transaction history via Messenger menus
Query transaction history via chatbot flows
Go to Chat > Flows and select the module you'd like to use, then click + Button to add a new button.
In the button settings, click the dropdown under On click, then select Integrated EC service > Query transaction history.
Query transaction history via LINE menus
Go to Chat > Content > Menus and open the LINE menu you'd like to edit.
Under Image upload and layout settings, click the button area you'd like to use, click the dropdown under Click the block, then select Integrated EC service > Query transaction history.
Query transaction history via Messenger menus
First, create the flow module that contains the button for querying transaction history action. Next, to Chat > Content > Menus and open the Messenger menu you'd like to edit.
Under Persistent menu item settings, click Add an item:
Name the menu item, then select the flow module you created from the dropdown menu.
4. (Optional) Enable automatic status notifications
Facebook limitationCertain automatic status notifications aren't supported for Facebook to comply with Facebook's notification policy of prohibiting messages containing promotional content, e.g. notifications related to points and reward credits.
The following types of notifications are supported:
| Notification type | Supported third-party services | Supported messaging platforms |
|---|---|---|
| Account linked | • 91APP • Cyberbiz • SHOPLINE | • LINE |
| Order updates: • Order placed • Order shipped • Order delivered • Order refunded | • Cyberbiz • SHOPLINE | • LINE |
| Point updates: • Points received • Points used | • Cyberbiz • SHOPLINE | • LINE |
| Reward credit updates: • Reward credits received • Reward credits used | • SHOPLINE | • LINE |
| Coupon received | • Cyberbiz • SHOPLINE | • LINE |
To enable notifications for linked third-party service accounts:
- Go to Integrations > App connection, then click on the connected account.

- Go to the Set up notifications tab, check Enable automatic status notifications, and select the types of notifications you'd like to enable.
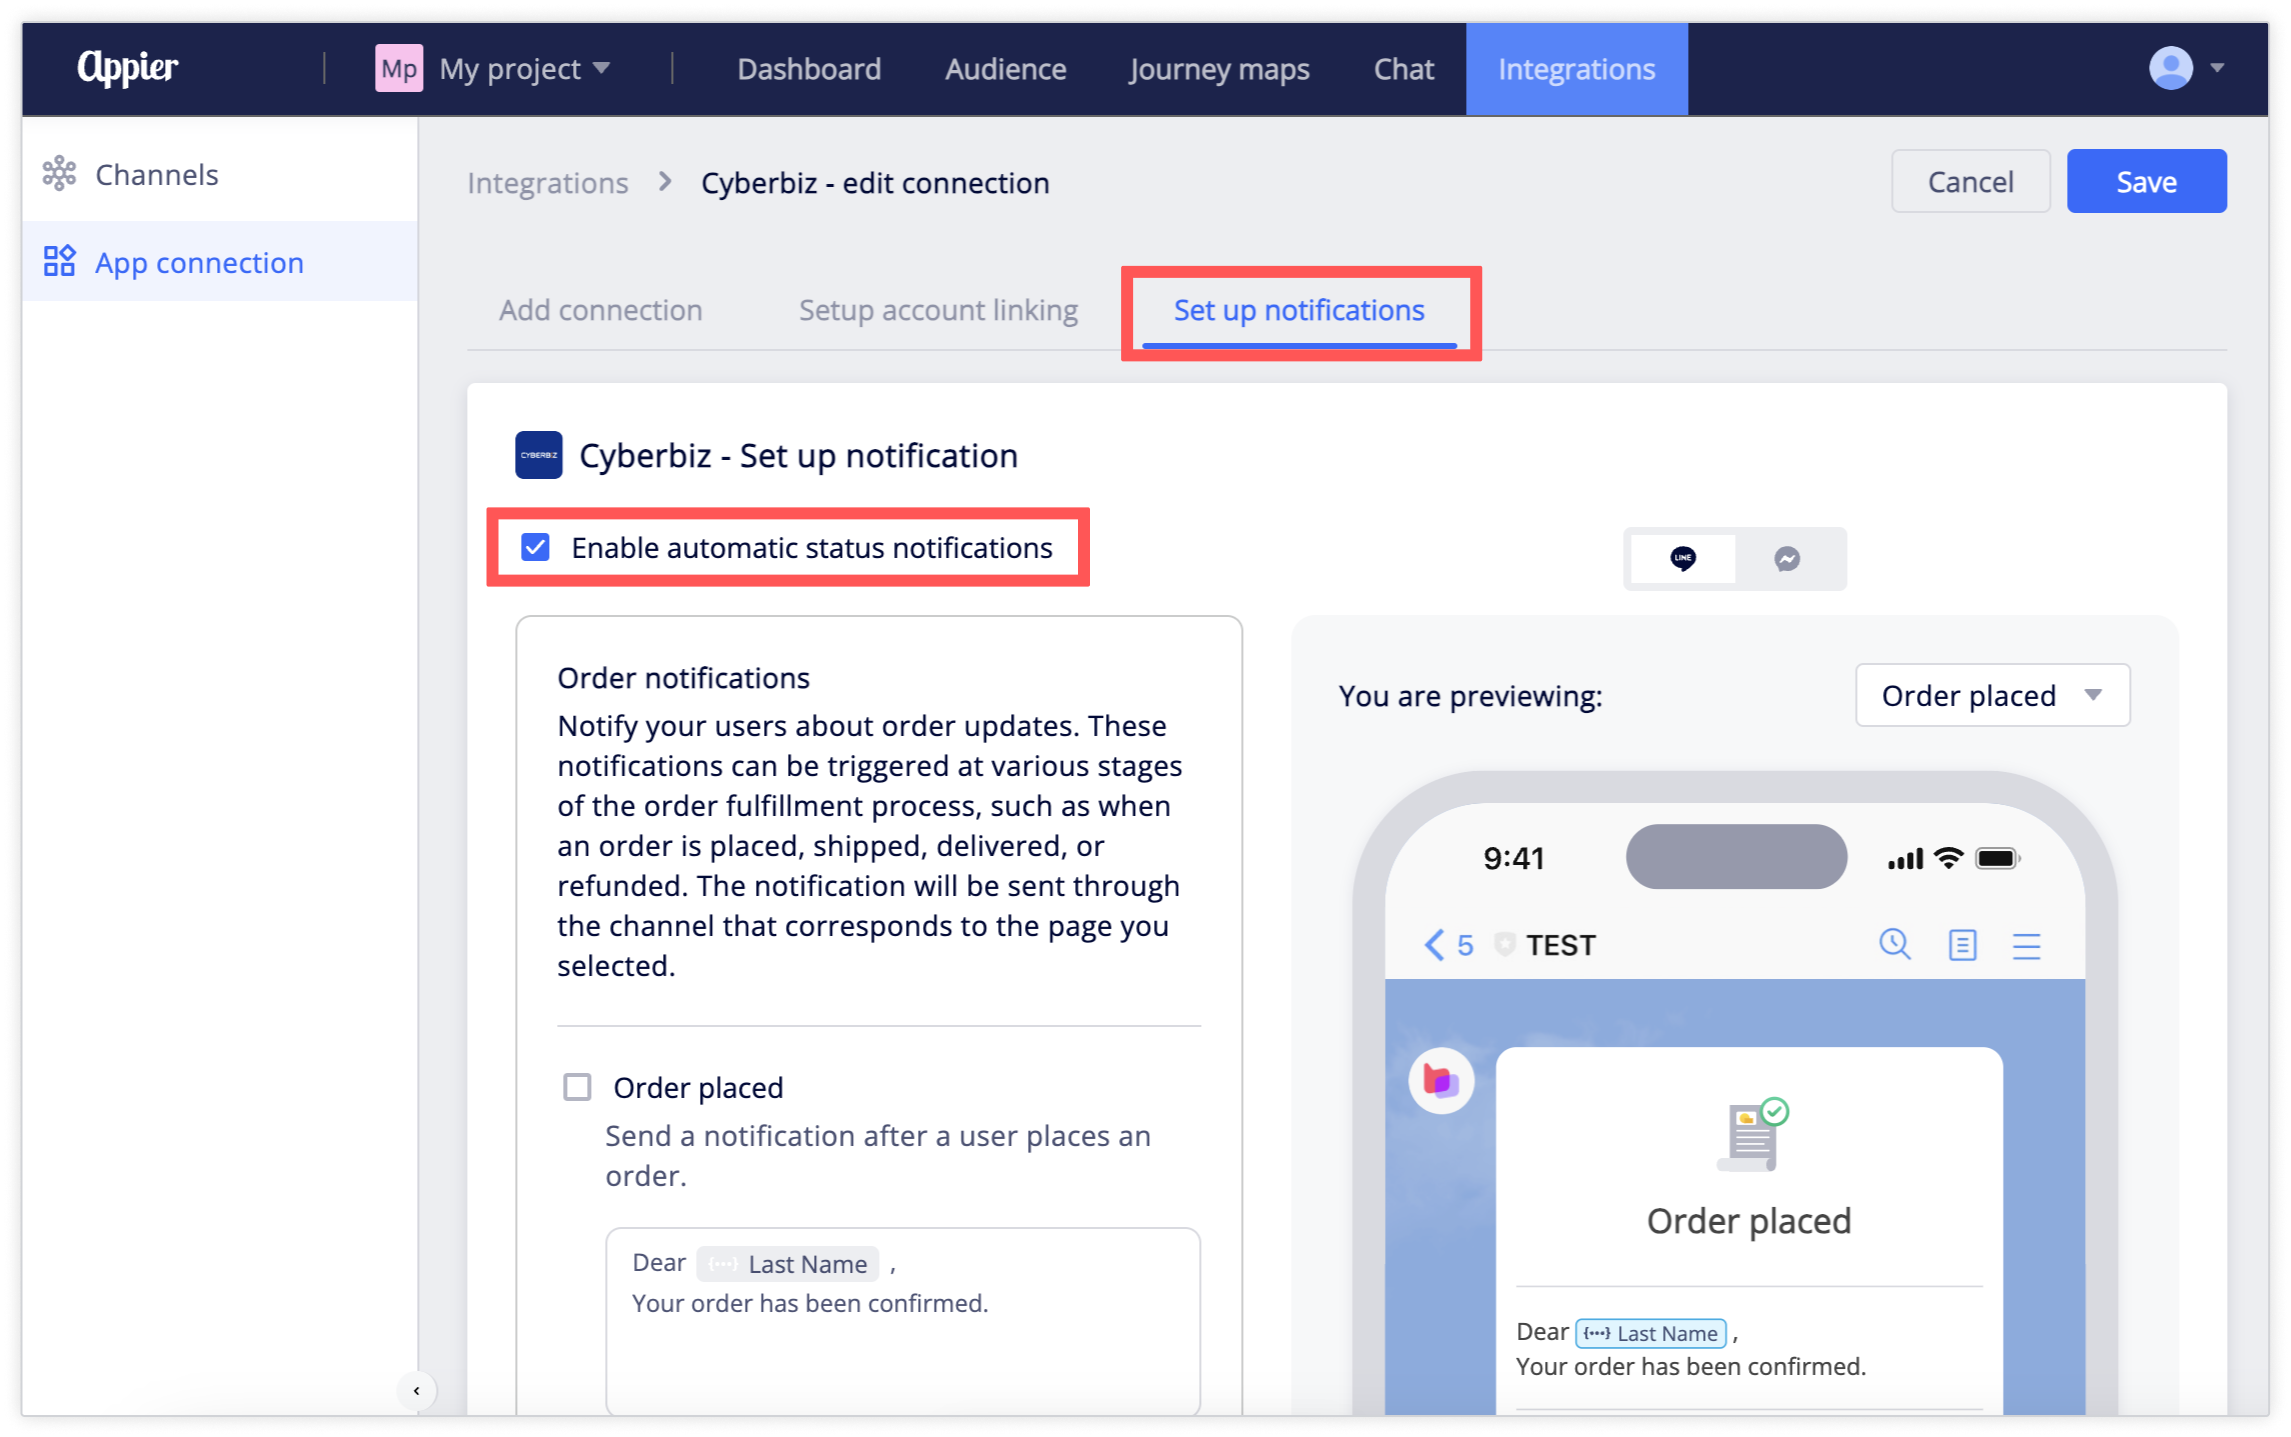
- After selecting the type of notifications you want to send, click Save.